Forget the simple dye kits from your childhood—this Easter, it’s time to elevate your egg game to designer-worthy status. Whether you’re hosting a sophisticated brunch or simply want your Easter basket to look like it belongs in a home décor magazine, these professional techniques will transform ordinary eggs into stunning works of art. The best part? You don’t need expensive tools or an art degree to achieve Instagram-worthy results.

Choose Your Color Palette First
Professional designers never start without a cohesive color scheme, and neither should you. Skip the rainbow approach and pick 2-4 colors that complement each other beautifully.
Designer-approved palettes to try:
- Soft pastels: blush, lavender, mint, and cream
- Modern neutrals: terracotta, sage, ivory, and charcoal
- Bold jewel tones: emerald, sapphire, ruby, and gold
- Monochromatic: varying shades of one color family
Pro tip: Visit your local paint store and grab a few color swatch cards for free. These make perfect references while you’re dyeing eggs and ensure your colors work harmoniously together.
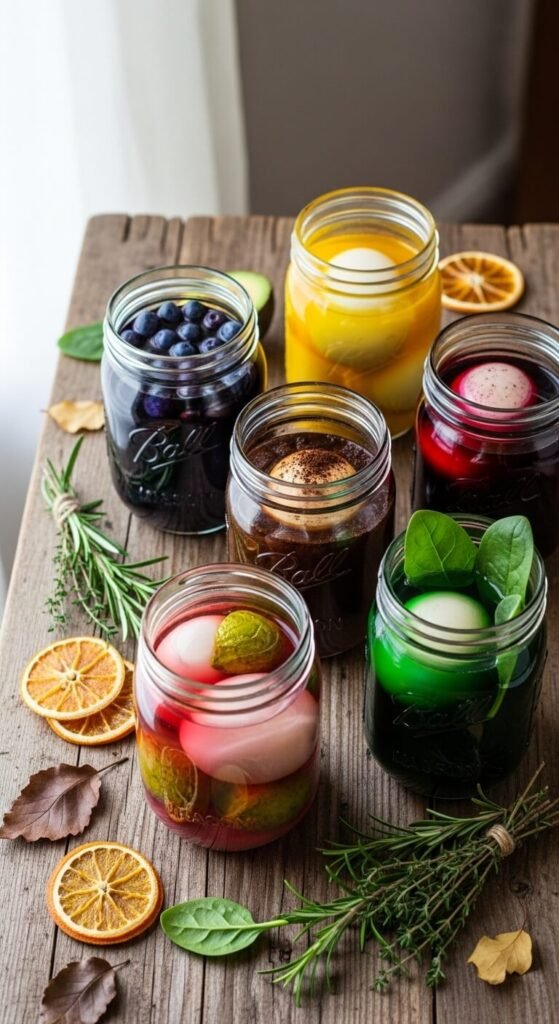
Master the Natural Dye Technique
Designer eggs often have that subtle, sophisticated look that screams “expensive.” The secret? Natural dyes create depth and variation that artificial colors simply can’t match.
Natural dye ingredients:
- Red cabbage → stunning robin’s egg blue
- Turmeric → warm golden yellow
- Beets → dusty mauve pink
- Yellow onion skins → rich terracotta
- Strong coffee → creamy tan
Simply boil your chosen ingredient in water for 15-20 minutes, strain, add 2 tablespoons of white vinegar, and let your eggs soak for at least 30 minutes. The longer they sit, the deeper the color becomes.
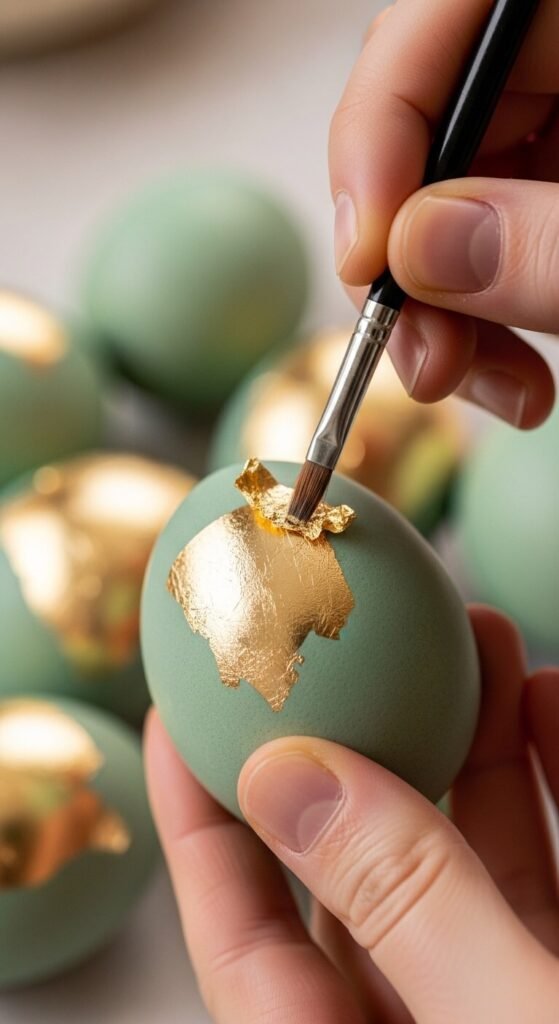
Add Texture with Simple Materials
This is where the magic happens. Texture transforms a plain colored egg into a designer statement piece.
Easy texture techniques:
- Wrap eggs in lace or mesh fabric before dyeing for delicate patterns
- Use rubber bands to create clean geometric lines
- Press fresh herbs or flower petals against the egg, secure with pantyhose, then dye
- Apply gold leaf to sections of the egg for luxe accents
- Create an ombré effect by gradually lowering the egg into the dye bath
The botanical print method is particularly stunning: place small leaves or petals against the egg, wrap tightly in an old nylon stocking, dye as usual, then unwrap to reveal beautiful silhouettes.
Try the Watercolor Effect
For an ultra-modern, artistic look, the watercolor technique is pure designer gold. It’s surprisingly simple and yields breathtaking results every time.
Mix food coloring or liquid watercolors with water to create diluted colors. Using a fine paintbrush or even a cotton swab, apply the colors directly to the egg in loose, organic strokes. Let colors blend naturally where they meet. The imperfection is what makes it perfect.
Layer different shades of the same color for depth, or let complementary colors gently merge together. Allow eggs to dry completely between color applications for a more controlled look, or work wet-on-wet for dreamy, abstract effects.
Finish with Matte or Metallic Accents
The finishing touch separates amateur eggs from designer masterpieces. A simple matte sealant spray gives eggs a sophisticated, modern finish that you’ll find in high-end boutiques.
Finishing options:
- Matte spray sealant for a contemporary, chalky finish
- Clear gloss for vibrant, shiny eggs
- Metallic paint pens for delicate patterns, dots, or lettering
- Spray paint in muted metallics like rose gold or brass
- Wax stamps for elegant, minimal designs
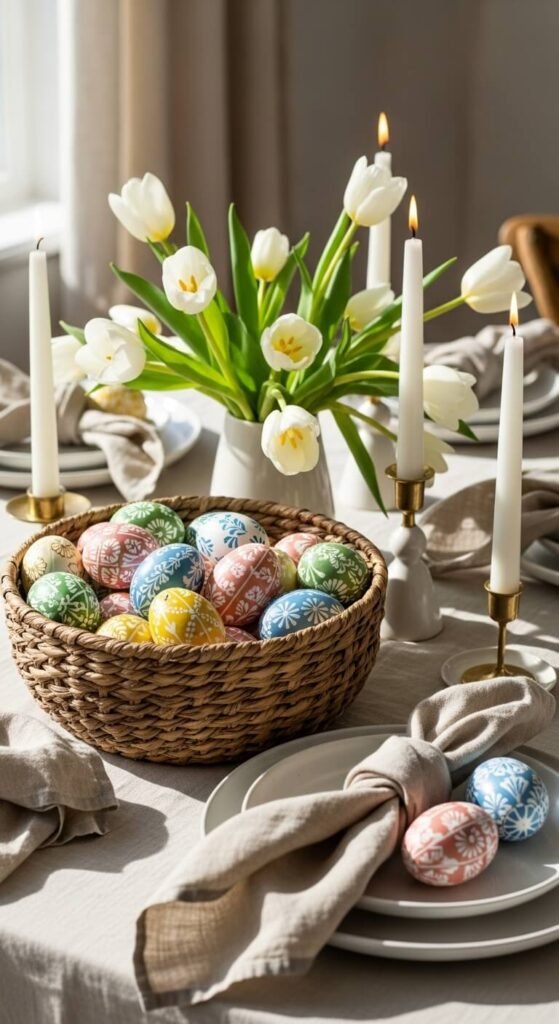
Display Your Creations
Don’t hide your designer eggs in a plastic basket! Display them like the art pieces they are.
Arrange them in a wooden dough bowl, a ceramic pedestal dish, or a vintage wire basket lined with fresh moss. Mix in natural elements like pussy willows, feathers, or spring branches. Create height variation by using small ceramic egg cups or display stands.

Your Designer Egg Takeaway
Creating designer-quality Easter eggs isn’t about perfection—it’s about thoughtful color choices, interesting textures, and beautiful finishing touches. Start with just a few eggs and one or two techniques that speak to you. As you gain confidence, experiment with layering different methods for truly unique results.