There’s something magical about watching winter fade away and spring bloom into view—and your mantel is the perfect canvas to celebrate this seasonal shift! Whether you’re drawn to pastel florals, fresh greenery, or bright pops of color, a well-decorated mantel can instantly transform your living space from cozy winter vibes to fresh spring energy.
The best part? You don’t need to be an interior designer or spend a fortune to create a stunning spring mantel display. With just a few simple steps and some creative touches, you can curate a space that feels both effortlessly chic and seasonally appropriate.

Ready to give your mantel the spring refresh it deserves? Let’s dive into five easy steps that will have your fireplace looking Pinterest-perfect in no time!
Step 1: Start with a Clean Slate
Before you can create your dream spring mantel, you need to clear away the remnants of winter (or whatever’s been collecting dust up there). Remove all existing decorations, wipe down the mantel surface, and take a moment to assess your space.
Pro tips for this step:
- Dust the mantel thoroughly and clean any mirrors or artwork above it
- Take measurements of your mantel’s length and depth—this helps when shopping for new pieces
- Stand back and look at the whole wall to consider scale and proportion
- Remove wall hangings temporarily if you’re planning to rearrange
Think of this as your blank canvas. A fresh start makes it so much easier to visualize your new spring display and prevents the cluttered look that happens when you just keep adding to existing decor.

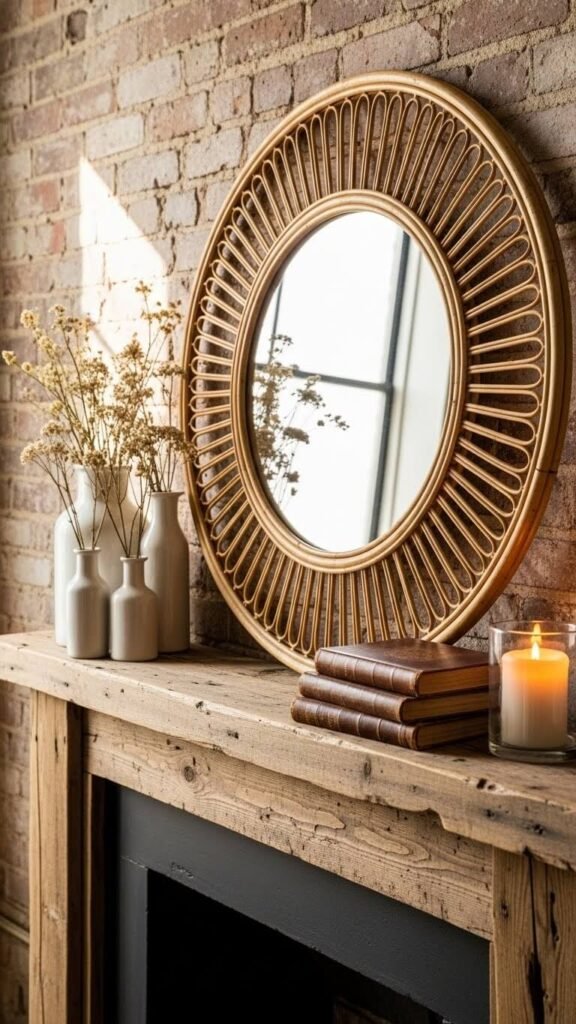
Step 2: Choose Your Anchor Piece
Every great mantel design starts with one statement piece that draws the eye and sets the tone for everything else. For spring, this could be a large mirror, an oversized piece of artwork, a decorative wreath, or even a beautiful vintage window frame.
Popular anchor piece ideas:
- A circular or arch-shaped mirror with a gold or natural wood frame
- Botanical artwork featuring spring flowers or gardens
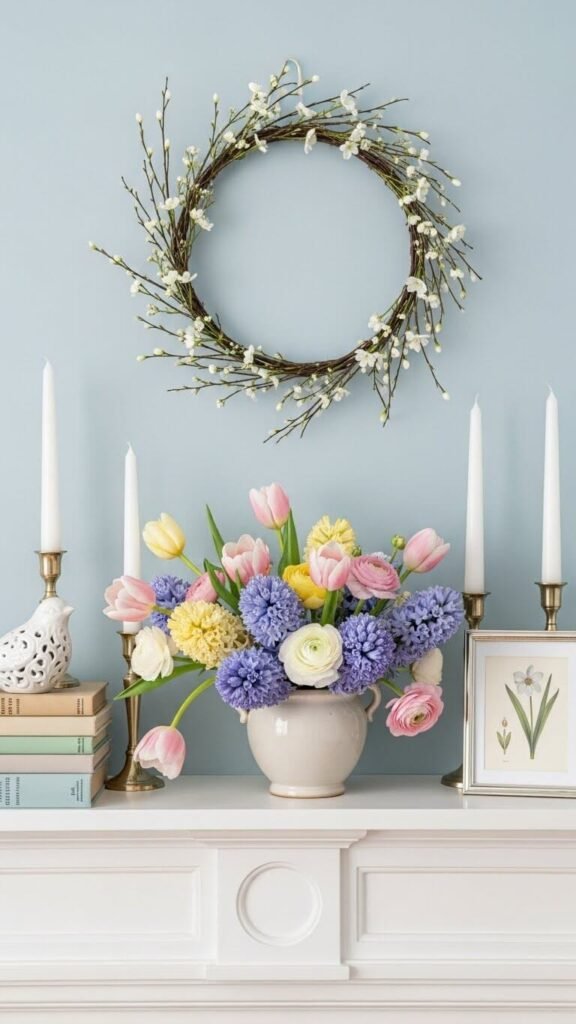
- A fresh spring wreath made with eucalyptus, tulips, or cherry blossoms
- A large “SPRING” or “BLOOM” letter sign in a complementary color
Your anchor piece should typically be the largest item on your mantel and positioned either centered above the fireplace or slightly off-center for a more modern, asymmetrical look. This piece establishes your color palette and style direction for the rest of the display.
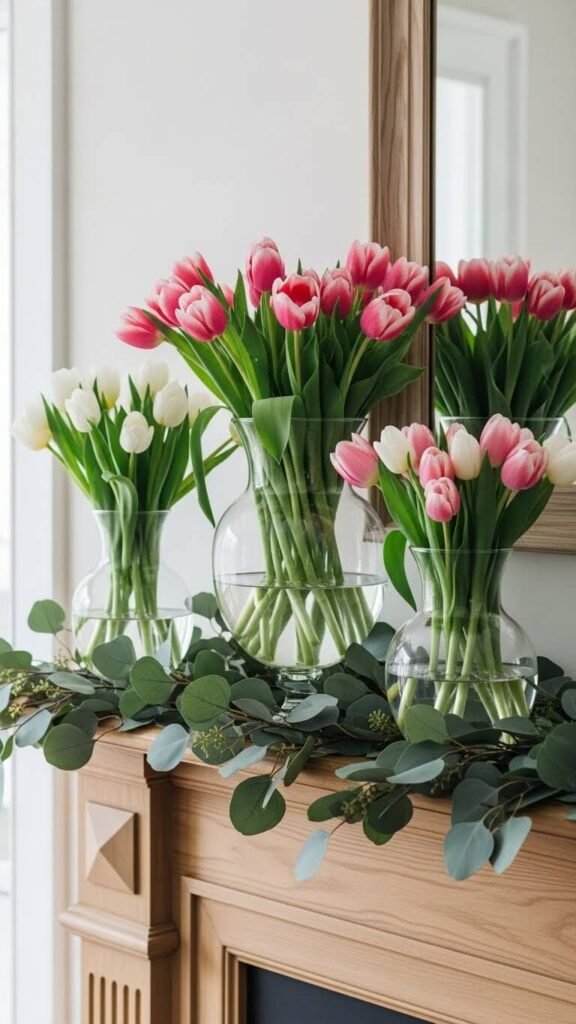
Step 3: Layer in Greenery and Florals
Now comes the fun part—bringing spring to life with fresh or faux botanicals! Greenery and flowers instantly add that seasonal touch and create visual interest with different heights and textures.
How to incorporate florals effectively:
- Mix real and faux flowers for longevity (tulips, daffodils, and cherry blossoms are spring favorites)
- Use varying heights—tall stems in vases on the sides, lower arrangements in the center
- Add eucalyptus garland draped casually across the mantel for a natural, organic feel
- Include potted plants like succulents or herbs for added dimension
- Don’t forget branches! Pussy willow or flowering branches add height and drama
The key is to create a sense of abundance without making it look overcrowded. Aim for an odd number of floral arrangements (three or five works beautifully) and vary the container styles—think ceramic vases, vintage pitchers, glass bottles, or even mason jars.
Step 4: Add Layers and Texture
To create depth and visual interest, you’ll want to layer different elements at varying heights. This is what separates a “just okay” mantel from one that looks professionally styled.
Layering techniques that work:
- Lean framed prints or small canvases against the wall behind other objects
- Stack vintage books horizontally and top with small decorative items
- Place candlesticks of different heights to create vertical interest
- Incorporate unexpected textures like woven baskets, ceramic vases, or wooden bowls
- Add small decorative objects like birds’ nests, ceramic bunnies, or vintage bottles
Think about creating “zones” on your mantel. Instead of spacing everything evenly (which can look stiff), group items together in small vignettes with breathing room between each grouping. This creates a more curated, collected-over-time aesthetic.
Step 5: Finish with Personal Touches and Final Adjustments
The final step is where your mantel truly becomes yours. Add those special finishing touches that reflect your personality and make the space feel complete.
Final touches to consider:
- Seasonal signage with spring quotes or phrases
- Candles in spring scents like lemon, lilac, or fresh linen
- Family photos in coordinating frames
- Decorative objects that tell your story (travel souvenirs, heirlooms, etc.)
- Battery-operated fairy lights woven through greenery for evening ambiance
Once everything is in place, step back and assess. Does your eye move naturally across the display? Is there good balance between both sides? Don’t be afraid to move things around until it feels just right. Sometimes shifting a vase two inches to the left makes all the difference!
Bring Spring Home
Decorating your mantel for spring doesn’t have to be complicated or expensive—it just takes a little creativity and these five simple steps. Remember, the best mantels reflect your personal style while celebrating the season, so don’t be afraid to put your own spin on these ideas.
Ready to refresh your space? Start gathering those spring blooms and greenery, and give your mantel the seasonal makeover it deserves. Your living room will thank you!