There’s something magical about opening your front door to a gorgeous spring wreath bursting with fresh florals and pastel hues. But here’s the secret: you don’t need to drop $80 at a boutique to get that professional look. With a few simple materials and these foolproof techniques, you can create a stunning spring wreath that’ll have your neighbors asking where you bought it.

The key to a store-bought look? It’s all about layering, choosing the right base, and knowing when to stop adding (yes, less can truly be more!).
Choose Your Wreath Base Wisely
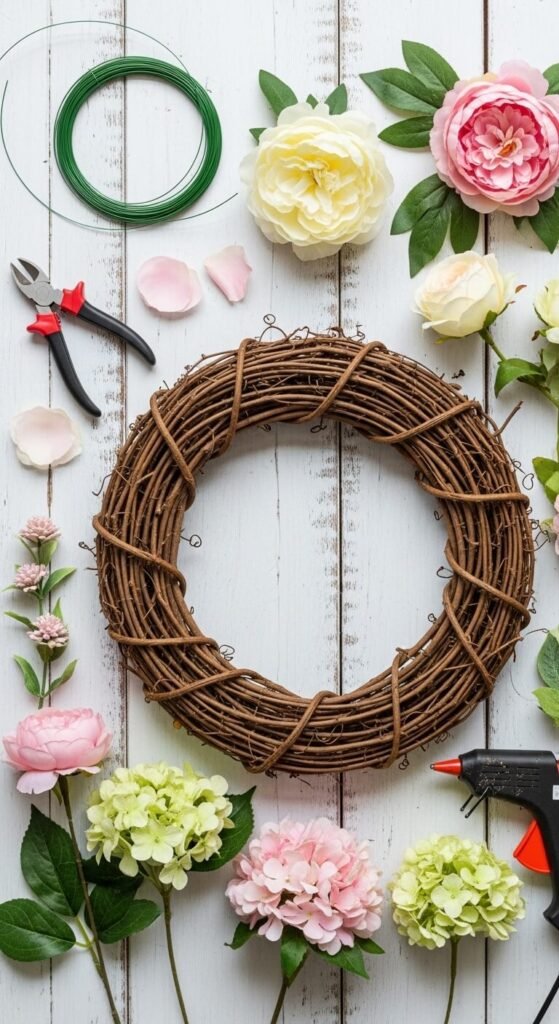
Your foundation makes all the difference. Skip the flimsy wire frames that scream “craft store DIY” and opt for one of these professional-quality bases:
- Grapevine wreaths: Perfect for a rustic, organic look with natural texture
- Foam-wrapped wire frames: Ideal for full, lush designs where you want maximum coverage
- Straw bases: Best for those abundant, cottage-core vibes
Pro tip: Choose a 14-16 inch base for standard doors, or go bigger (18-20 inches) for double doors or to make a bold statement.
Select a Cohesive Color Palette
This is where most DIY wreaths go wrong. Store-bought wreaths look polished because they stick to 3-4 colors max. For spring, try these winning combinations:
- Blush pink, cream, sage green, and white
- Lavender, soft yellow, white, and eucalyptus green
- Peach, coral, ivory, and natural wood tones
Once you’ve chosen your palette, gather your florals. Mix different textures and sizes: large statement flowers (peonies, hydrangeas), medium fillers (ranunculus, tulips), and delicate accents (baby’s breath, wildflowers).
Layer Like a Pro
Here’s the technique that separates amateur wreaths from professional ones: the three-layer method.
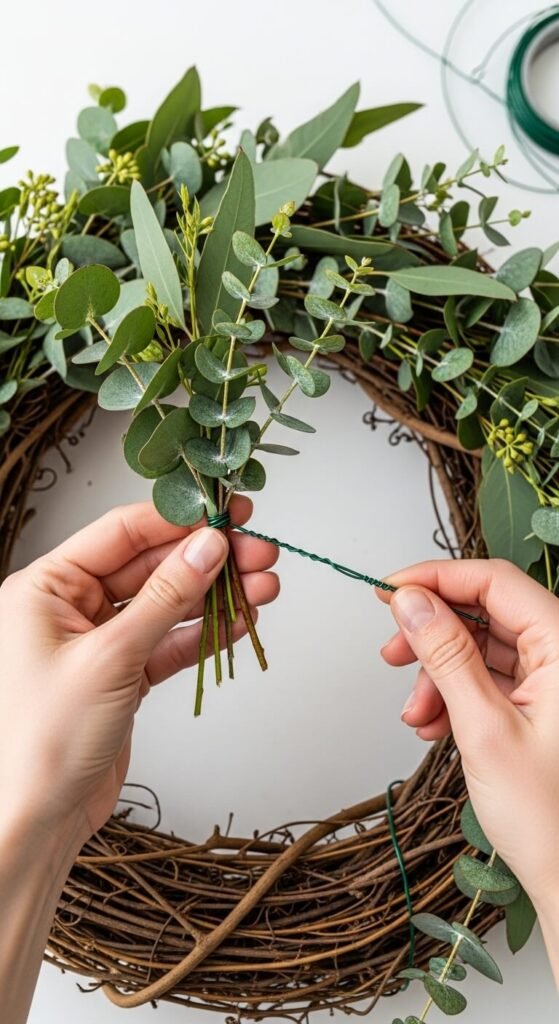
Layer 1: The Greenery Base Start by attaching your greenery all around the wreath, working in one direction. Use eucalyptus, ferns, or lambs ear to create a lush foundation. Secure with floral wire, not hot glue (it’ll look cleaner and last longer).
Layer 2: The Statement Flowers Place your largest blooms first, spacing them evenly around the wreath in odd numbers (3, 5, or 7 clusters). This creates visual balance. Trim stems to about 3-4 inches before inserting them into the base at a slight angle.
Layer 3: Fill and Finish Now add your medium-sized flowers to fill gaps, then tuck in delicate accents to add depth and movement. The secret? Don’t fill every single space. Leaving small gaps creates breathing room and looks more intentional.
The Ribbon Trick Everyone Needs
Want to know the easiest way to make your wreath look expensive? It’s all in the ribbon placement.
Use wired ribbon (it holds its shape better) and create either:
- A classic bow positioned at the bottom or top
- Cascading tails that flow elegantly down one side
- A simple, wrapped accent around the wreath itself

For that designer touch, let your ribbon tails hang long—about 1.5 times the length of your wreath diameter.
Finishing Touches That Make the Difference
Before you hang your masterpiece, step back and look for these common issues:
- Bare spots: Add small clusters of filler flowers or tuck in extra greenery
- Too symmetrical: Intentionally move one or two elements slightly off-center for organic appeal
- Flat appearance: Pull some flowers forward slightly to create dimension
Secure any loose elements with hot glue, trim any visible wire or stems, and fluff your flowers one final time.

Your Spring Wreath Awaits
Creating a professional-looking spring wreath is totally achievable when you focus on quality materials, a cohesive color story, and proper layering techniques. The best part? You can customize it exactly to your style and swap out elements as the seasons change.
Ready to create your own? Grab your supplies this weekend and give it a try. Once you master this technique, you’ll never buy a wreath again—and you might just find yourself making extras for friends!