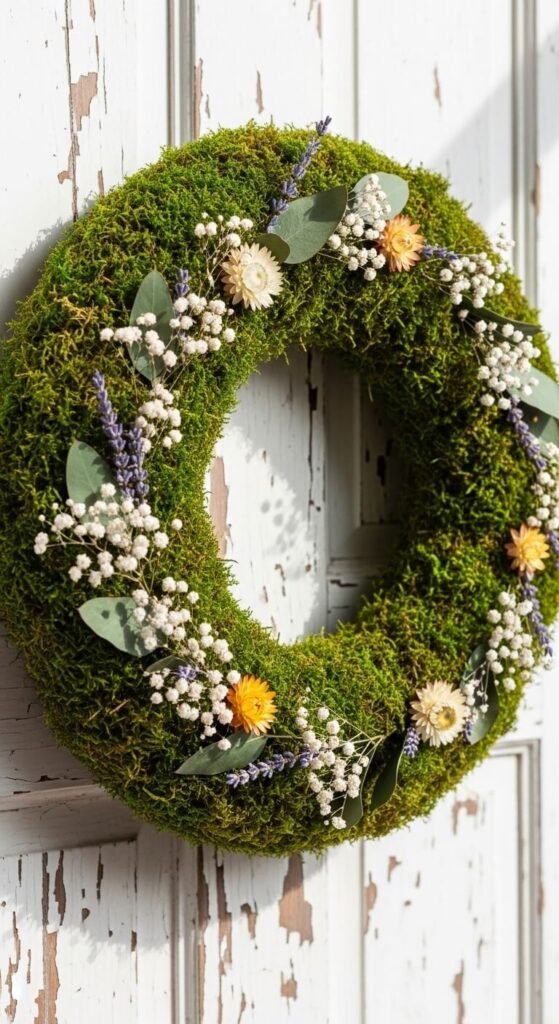
There’s something undeniably magical about a lush, green moss wreath hanging on your front door or above your fireplace. It looks like it came straight from a high-end boutique — but here’s the secret: you can make one yourself for a fraction of the cost, and it’s easier than you think.
Whether you’re a seasoned crafter or picking up hot glue for the first time, this guide will walk you through every step to create a wreath that genuinely looks professionally made.
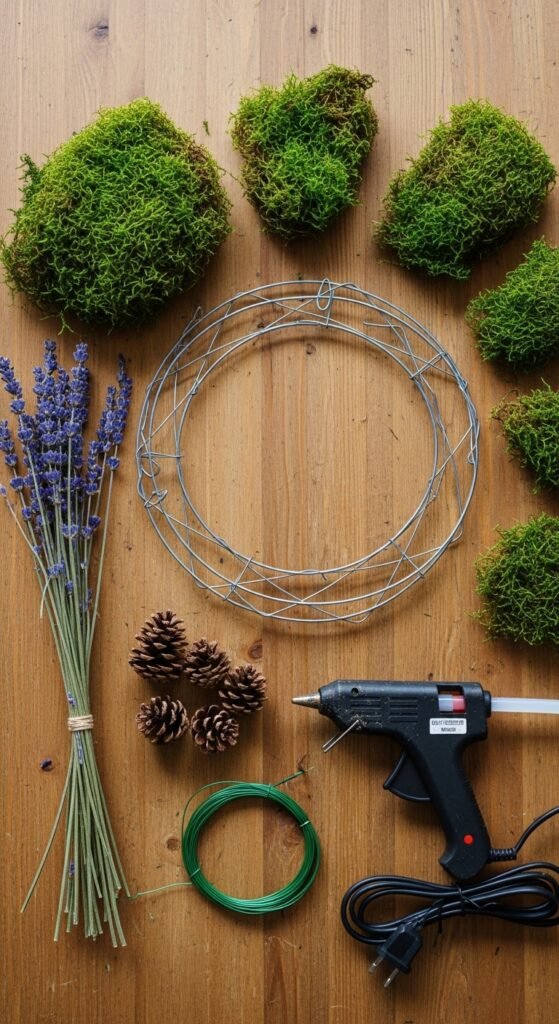
What You’ll Need Before You Start
Gathering your materials ahead of time makes the whole process smoother. Here’s your shopping list:
Wreath form – Wire, foam, or grapevine (12–16 inches is ideal for most doors)
Sheet moss or preserved moss – Available at craft stores or online; preserved moss stays green longer
Hot glue gun and extra glue sticks
Floral wire or fishing line – For securing larger moss clumps
Scissors and wire cutters
Optional embellishments – Dried flowers, pinecones, ribbon, berries, or small faux birds
Pro Tip: Preserved moss is the game-changer here. Unlike fresh moss, it won’t dry out and turn brown, keeping your wreath looking full and vibrant for months.
Preparing Your Moss and Wreath Form
Before you start gluing, a little prep work goes a long way.
If using sheet moss, break it into palm-sized pieces. You don’t want chunks that are too small (they’ll look patchy) or too large (they’ll curl and lift).
For your wreath form:
Wire forms work best when you wrap moss tightly into sections using floral wire
Foam forms are perfect for hot gluing directly onto the surface
Grapevine forms give a more rustic, organic feel and moss tucks beautifully into the gaps
Start by lightly misting your moss with water if it feels brittle. This makes it more pliable and easier to work with without cracking.
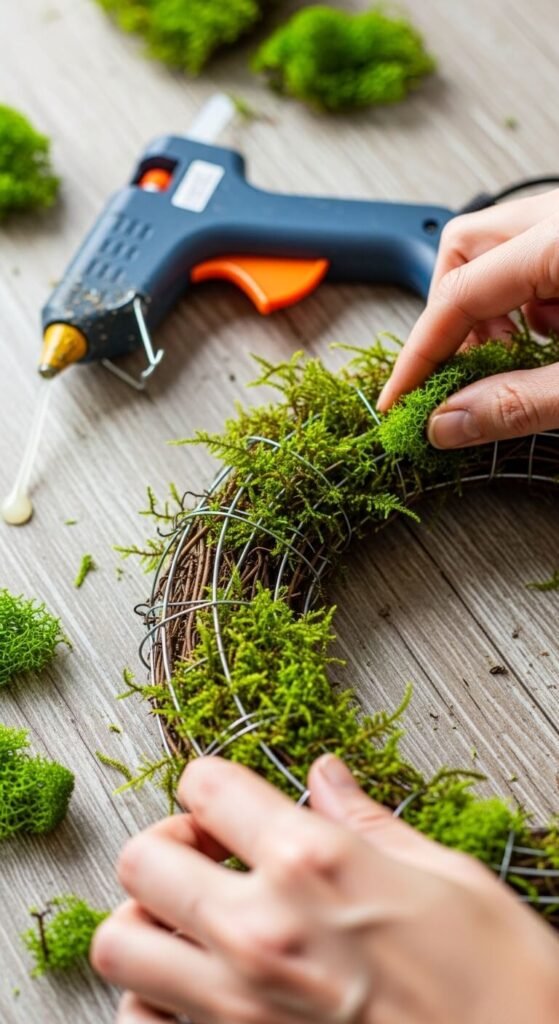
Building the Base Layer
This is where the magic happens — and it’s surprisingly satisfying.
Start at the inner ring and work your way outward, section by section.
Apply a generous line of hot glue to your wreath form, then press a moss piece firmly onto it for 10–15 seconds.
Overlap each new piece slightly over the last to avoid gaps and create that full, lush look.
Rotate as you go — step back every few minutes to check for thin spots.
Don’t stress about perfection at this stage. You’re building a base, and any gaps can be filled in later.
Filling In and Shaping
Once your base layer is complete, it’s time to refine the shape.
Hold the wreath up and look at it straight on — gaps become very obvious from this angle
Use smaller moss pieces to fill any thin spots
Gently tuck edges under neighboring moss clumps rather than just gluing on top
Trim any stray pieces with scissors to neaten the overall silhouette
The goal is a consistent, slightly rounded profile — think of it as sculpting rather than just decorating.
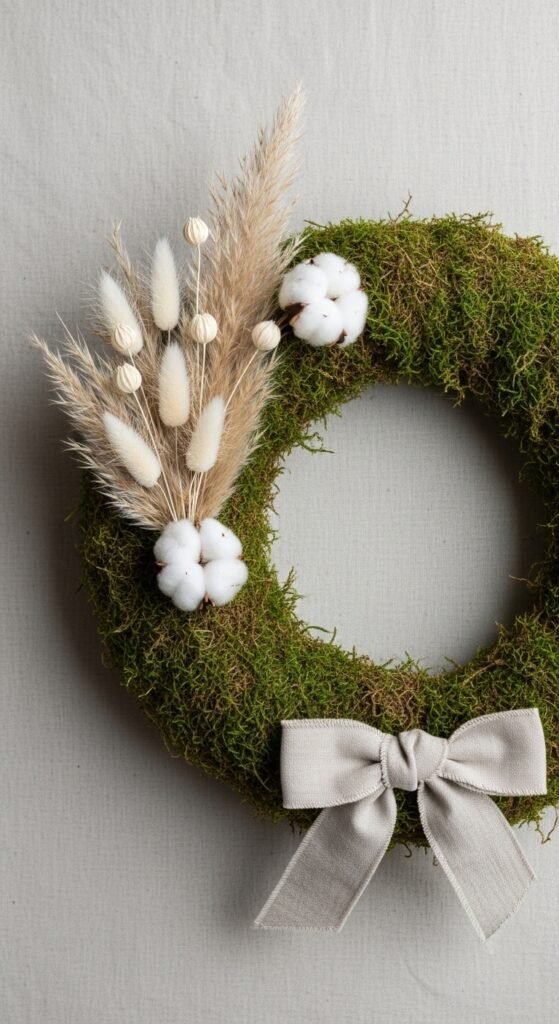
Adding Embellishments Like a Pro
This is where your wreath goes from homemade to wow.
Less is more. A few well-placed elements will always look more intentional than a wreath covered in every decoration you own.
Ideas that always look stunning:
A cluster of dried pampas grass or cotton stems offset to one side
Three to five small pinecones wired into a grouping
A simple linen or velvet ribbon bow at the bottom
Sprigs of dried lavender or eucalyptus tucked in at angles
Wire heavier embellishments on rather than just gluing them — they’ll hold up much better over time.
Displaying and Caring for Your Wreath
Hang your wreath out of direct sunlight and away from rain if possible. Preserved moss holds up beautifully indoors and in covered outdoor spaces.
Lightly mist the moss every few weeks to keep it from getting too dry
Store off-season in a cool, dry place wrapped loosely in tissue paper
Refresh embellishments each season for an entirely new look without starting from scratch
You’ve Got This — Now Go Make It
A moss wreath isn’t just a decoration — it’s a small, handmade piece of nature you brought into your home. With the right materials and a little patience, the result genuinely rivals anything you’d find in a boutique shop.
Save this guide, pin it for your next crafting weekend, and don’t forget to share your finished wreath — you’re going to be proud of this one.