Spring doesn’t have to end when the season does — especially when you know how to make a stunning tulip wreath with faux flowers. Whether you’re decorating your front door, a gallery wall, or your mantle, a DIY faux tulip wreath brings that fresh, breezy charm all year long. No watering. No wilting. Just pure, effortless beauty.

Ready to create your own? Let’s get into it.
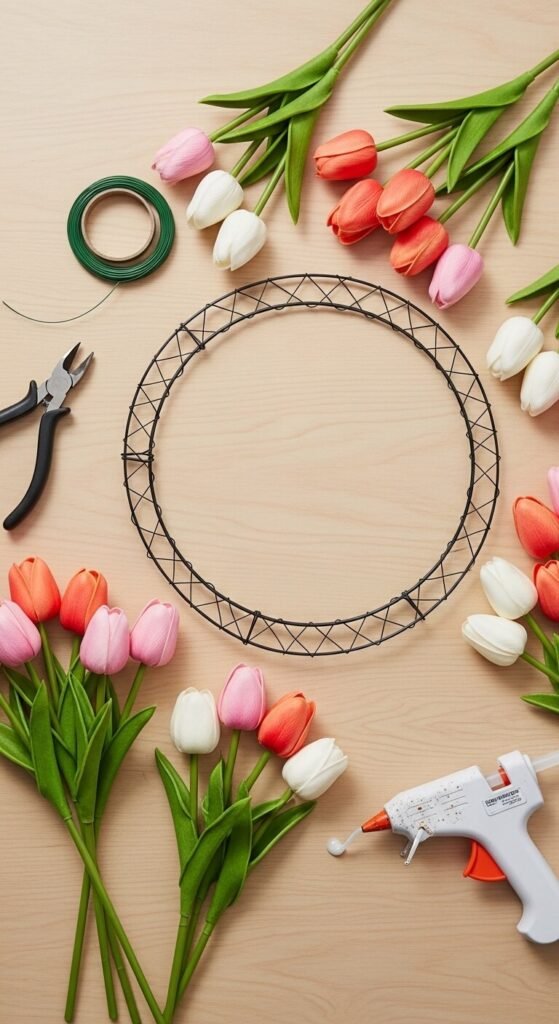
What You’ll Need
Before you start, gather your supplies. The good news? Most of these are easy to find at your local craft store or online.
- Faux tulip stems (15–20 stems in your choice of colors)
- Wire wreath frame (12–14 inch works well for most doors)
- Floral wire or zip ties
- Wire cutters
- Hot glue gun + glue sticks
- Greenery stems or eucalyptus picks (optional, for filler)
- Ribbon for hanging (optional)
Pro tip: Choose tulips in 2–3 complementary colors for a wreath that looks intentional and polished — think blush pink + cream + soft lavender, or sunny yellow + coral + white.
Step 1: Prep Your Tulip Stems
Start by trimming your faux tulip stems to about 6–8 inches long using your wire cutters. This length is ideal for wrapping around the frame without the stems sticking out awkwardly.
If your stems have leaves attached, keep a few — they add beautiful texture and make the wreath look more realistic and lush.
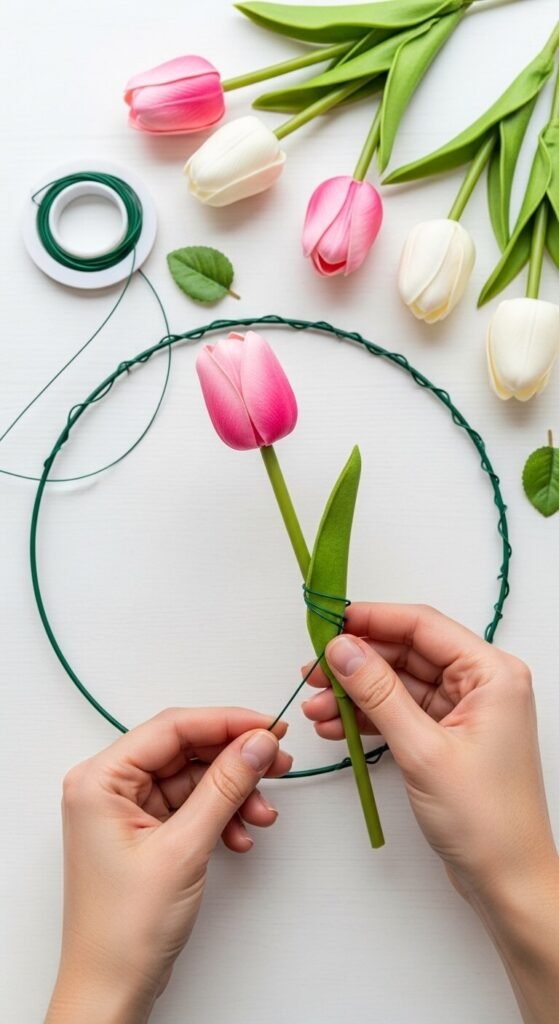
Step 2: Build Your Base
Lay your wire wreath frame flat on your work surface. Starting at any point, take your first tulip stem and secure it to the frame using floral wire or a zip tie. Wrap tightly so it doesn’t shift around.
Here’s the trick: always angle your stems in the same direction as you go around the wreath. This gives it that professional, flowing look rather than a cluttered, random feel.
Continue adding stems, slightly overlapping each one to cover the frame and the wire holding the previous stem.
Step 3: Fill in the Gaps
Once you’ve gone around the entire frame, step back and look for any sparse or bare spots. This is where your greenery picks come in handy! Tuck in small sprigs of faux eucalyptus or baby’s breath between tulips to add depth and fill any gaps.
Use your hot glue gun to secure any stems that feel loose or are lifting away from the frame. A small dot of glue goes a long way.
A few extra tips:
- Vary the height of your tulip heads slightly for a natural, garden-fresh look
- Mix bud-stage tulips with fully open blooms for dimension
- Don’t stress about perfection — organic and slightly wild looks gorgeous
Step 4: Add the Finishing Touches
Almost there! Now’s the time to personalize your wreath.
- Add a bow using a wide satin or burlap ribbon at the bottom or top of the wreath for an elegant touch
- Tuck in extras like small butterflies, pearl picks, or faux berries if you want more texture
- Adjust any stems that have shifted, pressing them down and securing with a little extra glue if needed

How to Hang and Display Your Wreath
For front doors, loop a ribbon over the door or use an over-the-door wreath hanger. For walls and mantles, a simple adhesive hook works perfectly.
Faux wreaths are also weatherproof enough for covered porches — just bring them in if there’s heavy rain or wind.
Why Faux Tulips Are the Secret Weapon
Real tulips are gorgeous but fleeting. Faux tulips, on the other hand, hold their shape and color for years with minimal care. A quick dusting with a soft cloth or a gentle blast from a hairdryer on the cool setting is all the maintenance you’ll ever need.

Your New Favorite Spring Tradition
Making a faux tulip wreath is one of those crafts that feels genuinely rewarding — and looks like it took way more skill than it actually did. Once you’ve made your first one, you’ll want to make them in every color for every season.