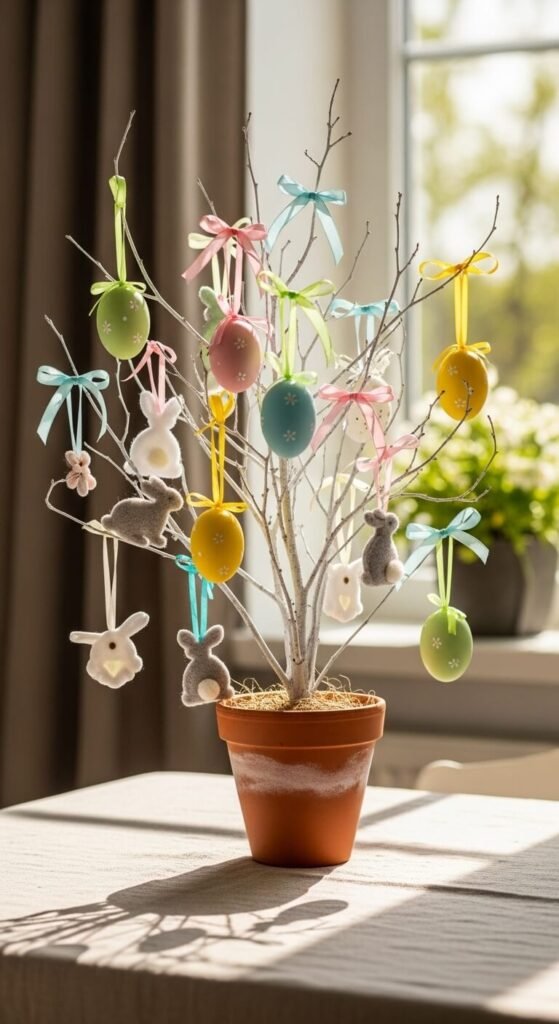
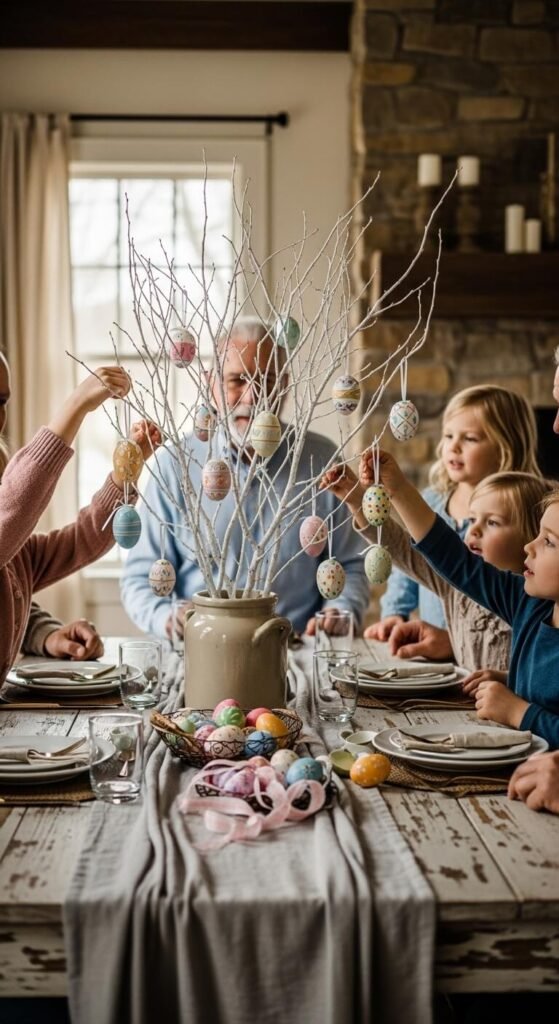
There’s something magical about a decoration that earns its own special place in your home — year after year, without question. The Easter tree is exactly that. It’s charming, customizable, and the kind of project that turns into a family ritual kids will ask for every single spring. If you’ve never made one before, this is your sign to start.
What Is an Easter Tree (and Why You Need One)?
Think of it as a Christmas tree — but make it spring. An Easter tree is typically a bundle of decorative branches displayed in a vase or pot, then hung with handmade or store-bought ornaments. It’s rooted in Scandinavian and German tradition, but it translates beautifully into any home style, from farmhouse to modern boho.
The best part? It grows with your family. Every year, you add new ornaments, and before long, you have a tree full of memories.
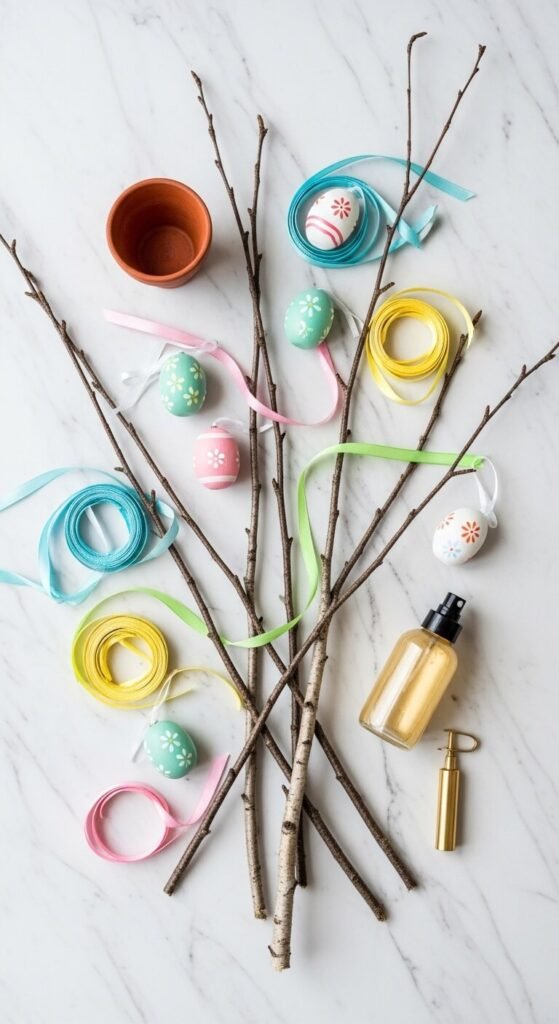
What You’ll Need
You don’t need much to get started. Here’s a simple supply list:
- Branches — birch, forsythia, or cherry blossom work beautifully (real or faux)
- A heavy vase, crock, or pot to anchor the branches
- Floral foam or stones to secure the base
- Easter ornaments — eggs, bunnies, chicks, flowers
- Ribbon or twine for hanging
- Optional: spray paint in white, gold, or pastel to coat the branches
Step 1: Choose and Prep Your Branches
Head to your backyard, a craft store, or a floral shop. Look for branches with interesting shapes — lots of forks and offshoots give you more hanging spots.
- Natural branches: Forsythia or budding cherry branches bring life and texture.
- Faux branches: Great for reusing year after year — a worthy investment.
If you want a polished look, lightly spray paint your branches white, gold, or even a soft blush pink. Let them dry completely before decorating.
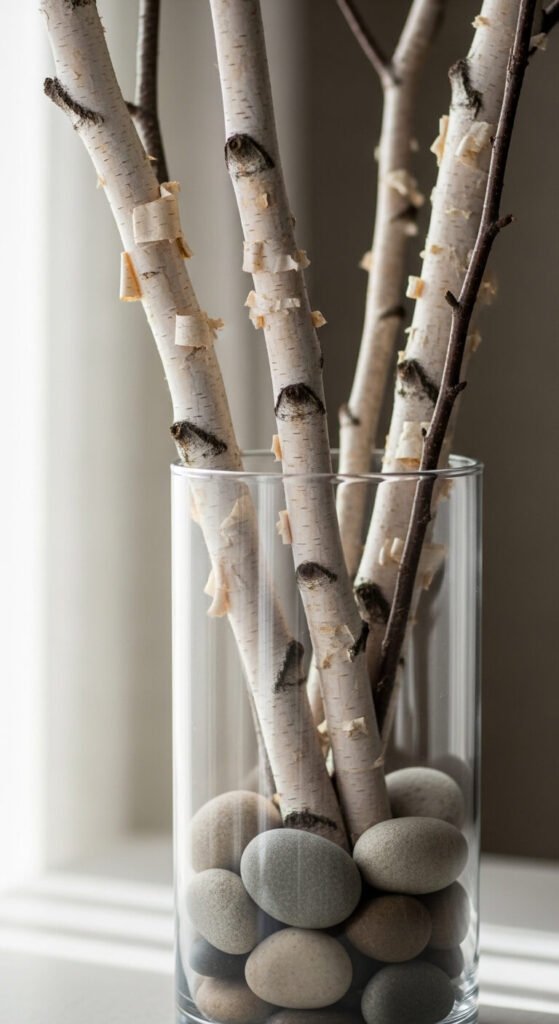
Step 2: Anchor Your Tree
Place your branches in a vase or pot and secure them with one of these methods:
- Floral foam: Wedge it into the container, soak with water if using real branches
- River stones or marbles: Heavy and beautiful — fill the vase partway and nestle the branches in
- Plaster of Paris: For a super-secure, permanent setup with faux branches
Aim for a balanced arrangement. Spread branches outward so ornaments can hang freely without crowding.
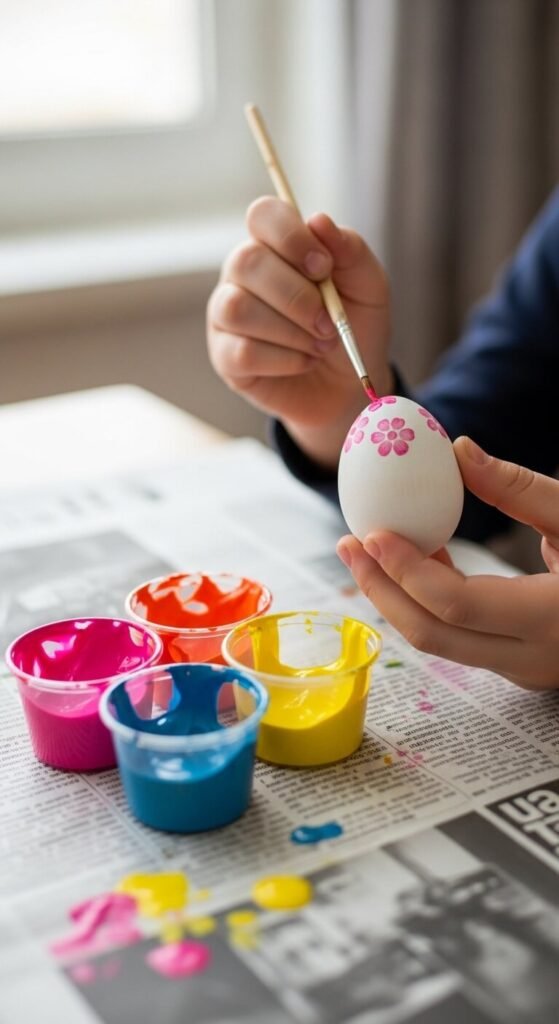
Step 3: Make or Choose Your Ornaments
This is where the tradition truly begins. You can go the easy route with store-bought ornaments — or make it meaningful with DIY ones.
Easy DIY ornament ideas:
- Blow out real eggs and paint them with watercolors or acrylics
- Cut felt into egg and bunny shapes, punch a hole at the top, and thread with twine
- Write the year and a child’s name on a wooden egg each Easter
Store-bought picks to look for:
- Blown glass eggs in pastel colors
- Tiny porcelain bunnies
- Miniature wicker nests with speckled eggs
Hang everything with pastel satin ribbon, jute twine, or thin wire for a polished finish.
Step 4: Style It in Your Space
Place your Easter tree somewhere it can be admired. A dining table centerpiece, an entryway console, or a kitchen island all work wonderfully.
Add a few finishing touches around the base:
- A ring of moss or faux grass
- A small nest with candy eggs tucked inside
- A few spring flowers in a separate bud vase nearby
How to Make It a Yearly Tradition
The secret to a tradition is repetition with intention. Try these ideas to make your Easter tree something the whole family looks forward to:
- Add one new ornament each year — date it so you remember when
- Let kids make their own ornament every Easter as a keepsake
- Take a photo of the tree each year and watch it evolve over time
- Pass down the tradition — give grown kids their own starter ornaments when they leave home
Start Your Easter Tree This Year
The Easter tree is one of those rare decorations that gets better every single year. It starts as a simple craft project and becomes something far more meaningful — a marker of seasons, of childhood, of family togetherness.