Bring a little piece of nature indoors — without ever stepping into the woods.
Imagine picking up a delicate bird’s nest from your shelf and having guests do a double-take, genuinely unsure if it’s real. That’s the magic of handmade bird nest decor — rustic, charming, and surprisingly simple to create. Whether you’re styling a spring vignette, a woodland-themed tablescape, or a cozy farmhouse shelf, a realistic-looking nest adds instant organic warmth. And the best part? You can make one in an afternoon with materials you might already have lying around.
What You’ll Need
Before you dive in, gather your supplies. The secret to a convincing nest is layering real and natural-looking materials — the more texture, the better.
Base materials:
- Grapevine wire or floral wire (for structure)
- Spanish moss, dried straw, or raffia
- Twigs, small dried stems, or bark strips
- Hot glue gun and glue sticks
For the finishing details:
- Feathers (craft store or foraged)
- Dried grass, coconut fiber, or jute twine
- Faux or real speckled eggs (robin blue, cream, or brown)
- A small round bowl or balloon to use as a mold
The key is to skip perfectly uniform materials. Real nests are messy and layered — so don’t be afraid to mix textures freely.
Step 1 — Build Your Base Structure
Start with your grapevine or floral wire. Coil and twist it into a loose circular shape about 5–6 inches wide. This becomes the skeleton of your nest, giving it that organic, irregular shape birds naturally create.
Wrap the wire frame with raffia or dried straw, securing it with small dots of hot glue as you go. Work in layers — think of yourself as a bird weaving materials together strand by strand. Press a small bowl against the center to shape the interior curve while the glue is still warm.
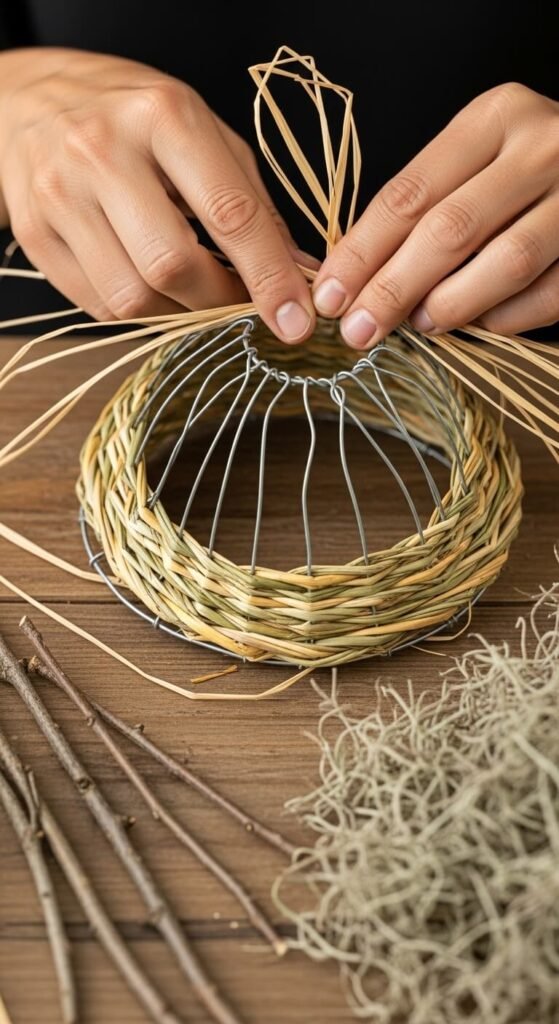
Step 2 — Layer in the Natural Materials
This is where the magic happens. Once your base is set, start pressing in your textural elements:
- Twigs and bark strips go on the outside for a rugged, woody look
- Spanish moss or coconut fiber fills the interior for that soft, cushioned feel
- Dried grass and jute can be tucked in anywhere to break up the uniformity
Hot glue each layer in place, but don’t over-glue — you want materials to look naturally interwoven, not stiff. Step back often and look at it from a distance. Real nests have depth and dimension, so keep building up until yours feels full and layered.
Pro tip: Lightly mist the finished nest with brown or tan spray paint from about 12 inches away. This unifies the colors and adds an earthy, aged tone that looks remarkably authentic.
Step 3 — Add the Finishing Touches
Now for the most satisfying part — the details that make it look real.
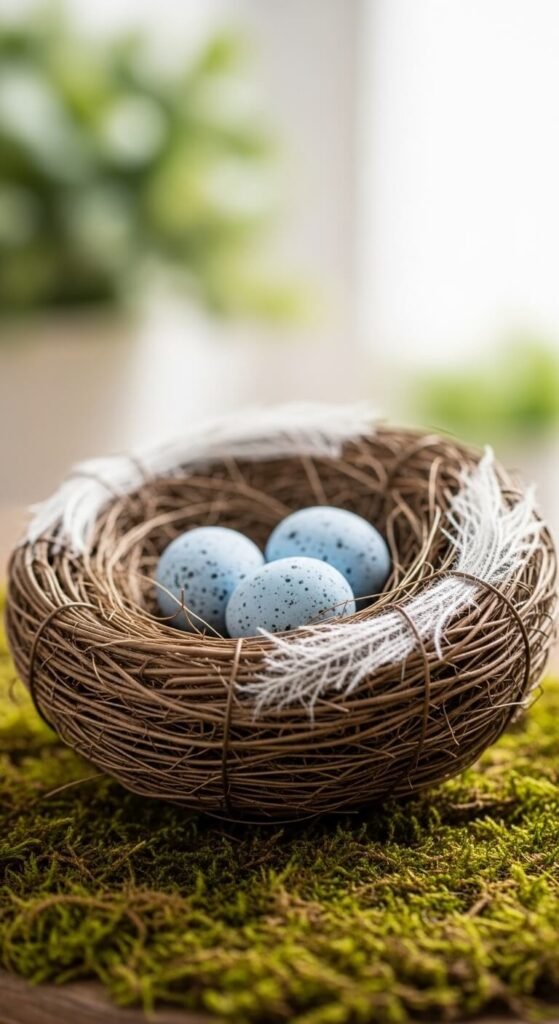
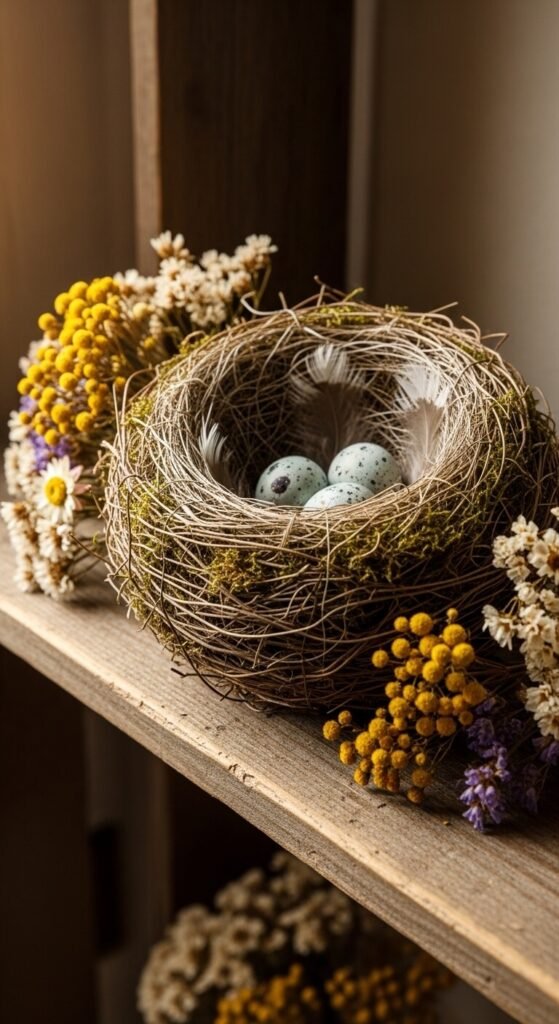
Tuck in a few small feathers along the rim — this instantly reads as “real nest” to the eye. Add your faux eggs in an odd number (one, three, or five looks most natural). Robin’s egg blue is a perennial favorite, but creamy white or pale brown eggs also give a beautiful, understated result.
For extra realism, lightly sand or distress the eggs with fine-grit sandpaper to dull any plastic shine. A tiny dab of brown craft paint dabbed on with a sponge can mimic the natural speckles beautifully.
How to Style Your Bird Nest Decor
Once your nest is finished, the styling possibilities are endless:
- Spring mantel: Place the nest among fresh greenery, white candles, and small pots of moss
- Bookshelf vignette: Tuck it beside stacked vintage books and a small glass terrarium
- Table centerpiece: Arrange three nests in varying sizes down the center of a dining table
- Wreath accent: Hot glue the nest directly onto a grapevine wreath for instant charm

Your New Favorite Nature-Inspired Craft
Making your own bird nest decor is one of those crafts that feels almost meditative — slow, tactile, and endlessly satisfying. Once you make one, you’ll want to make five. They’re perfect for gifting, seasonal decorating, and adding that raw, natural beauty that no store-bought piece can quite replicate.