Spring is finally here, and there’s no better way to welcome the season than with a beautifully styled tiered tray! Whether you’re a farmhouse decor enthusiast or just love adding seasonal touches to your home, a tiered tray is the perfect canvas for showcasing all those adorable spring finds.
The best part? You don’t need to be a professional decorator to create something Instagram-worthy. With a few simple tricks and the right mix of decor pieces, you’ll have a stunning spring display that makes you smile every time you walk by.
Let’s dive into the step-by-step process of creating a tiered tray that screams spring!
What You’ll Need
Before we get started, let’s talk about gathering your supplies. You don’t need to break the bank – in fact, some of the best tiered tray decor comes from unexpected places!
Here’s what to look for:
- A tiered tray (wood or metal works great)
- 3-5 larger statement pieces
- Small filler items (think mini signs, eggs, flowers)
- Fresh or faux greenery
- Seasonal accents in spring colors
- Mix of textures (wood, ceramic, metal, fabric)
Pro tip: Hit up your local dollar store, Target dollar spot, and craft stores for budget-friendly finds. Thrift stores are also goldmines for unique vintage pieces!
Step 1: Choose Your Color Palette
This is where the magic begins! Spring gives you SO many gorgeous color options, but try to stick to 2-4 main colors to keep your display cohesive.
Popular spring color combos:
- Soft pastels (blush pink, mint green, butter yellow)
- Classic spring (grass green, sky blue, white)
- Farmhouse neutrals (cream, tan, soft gray with pops of green)
- Bold and cheerful (bright yellow, coral, turquoise)
Once you’ve chosen your palette, everything else falls into place much easier!
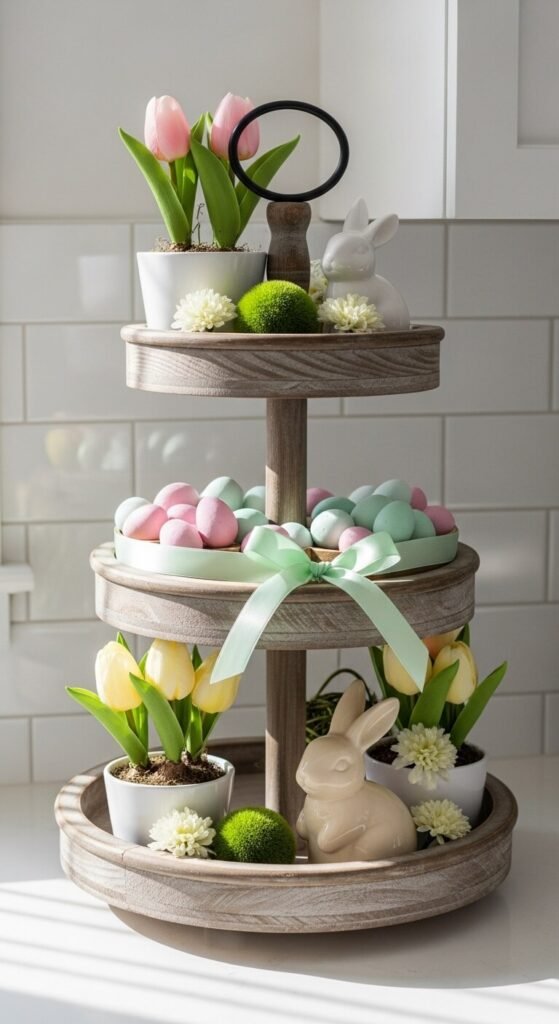
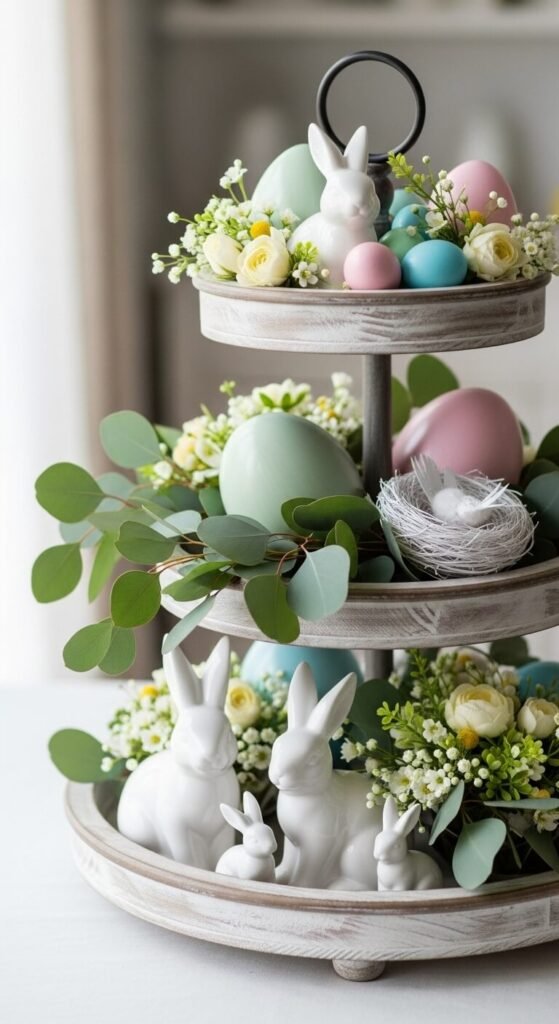
Step 2: Start with a Statement Piece
Your bottom tier should anchor the whole display with your largest, most eye-catching piece. This could be:
- A chunky wooden bunny
- A decorative pitcher with flowers
- A large spring sign
- A ceramic tulip arrangement
Place this on one side of the bottom tier – not dead center. This creates visual interest and leaves room for other elements. The rule of thirds works wonders here!
Step 3: Add Height and Dimension
Now let’s build upward! The middle and top tiers need pieces that draw the eye up and create that layered, abundant look.
Layer strategically by:
- Placing taller items toward the back
- Using books or small risers to elevate certain pieces
- Leaning signs at an angle rather than laying them flat
- Mixing heights – tall, medium, short
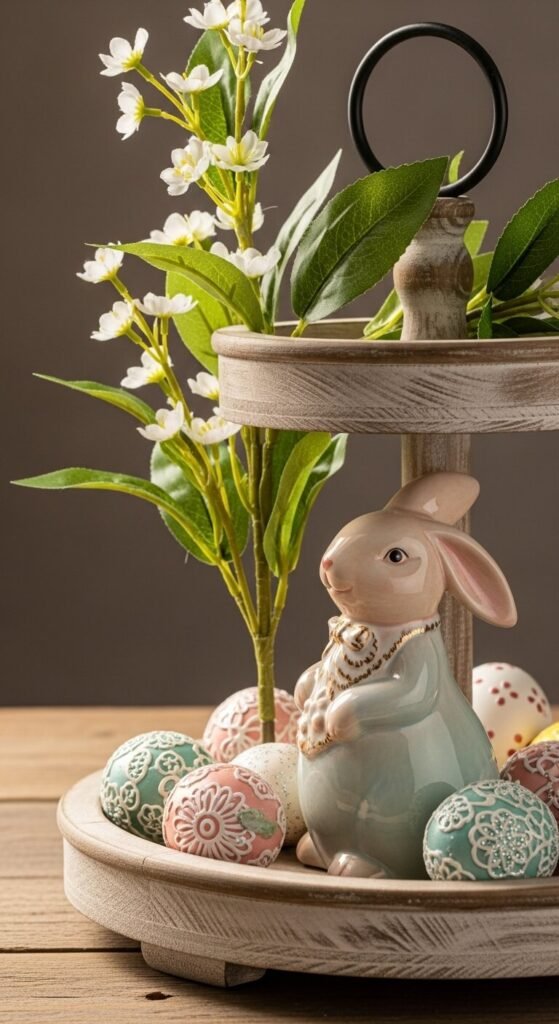
Don’t be afraid to let some elements peek over the edge slightly – it adds charm and makes the display feel more organic!
Step 4: Fill in with Smaller Accents
This is where your tiered tray really comes to life. Time to add all those adorable little details that make people stop and look closer.
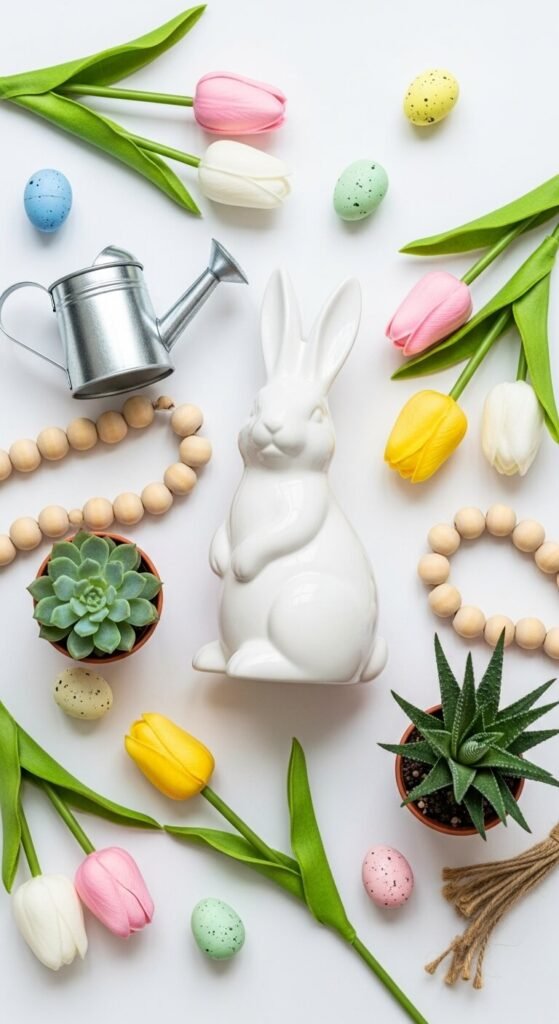
Perfect small fillers include:
- Mini potted plants or faux florals
- Decorative eggs (speckled, painted, or wooden)
- Spring-themed wooden beads
- Tiny watering cans or gardening tools
- Small bunny or chick figurines
- Miniature books or vintage finds
Cluster smaller items in groups of odd numbers (3 or 5 works beautifully). This feels more natural to the eye than even numbers.
Step 5: The Finishing Touches
Almost there! Now step back and look at your creation. Does anything feel off? Here’s how to polish it:
Add fresh greenery to fill gaps – eucalyptus, lamb’s ear, or faux vines work wonderfully. They soften the display and tie everything together.
Check your balance. If one side feels heavy, add a small accent to the other. The goal is visual harmony, not perfect symmetry.
Play with textures. Mix smooth ceramics with rough wood, shiny metal with matte finishes. This depth makes your display more interesting.
Make It Your Own!
The beauty of tiered tray styling is that there are no hard rules. These steps are guidelines, but your personal style should shine through! Don’t love bunnies? Swap them for birds or butterflies. Prefer a more modern look? Stick to geometric shapes and metallic accents.
The key is to have fun with it and switch things up as the season progresses. When those Easter eggs feel dated, swap them for May flowers!