Spring is knocking at the door, and nothing says hello, Easter season quite like a handmade bunny wreath hanging on your front door. Whether you’re a seasoned crafter or someone who just discovered the joy of a hot glue gun, this project is beginner-friendly, budget-conscious, and absolutely adorable. Get ready to make something that stops every neighbor in their tracks.

What You’ll Need
Before you dive in, gather your supplies. The good news? Most of these can be found at your local craft store or even the dollar section at Target.
Grapevine or foam wreath base (12–16 inches works great)
White faux fur fabric or fluffy white yarn
Pink felt or craft foam (for the inner ears)
Two googly eyes or black buttons
Pink pom-pom (for the nose)
A large white pom-pom or faux fur ball (for the tail)
Pastel ribbon (at least 2–3 yards)
Faux spring flowers — think daisies, lavender, or tulips
Hot glue gun and glue sticks
Wire cutters and scissors
Pro tip: Shop the Easter seasonal aisle early — prices are lower and selection is better in late February and early March.
Step 1: Build Your Bunny Base
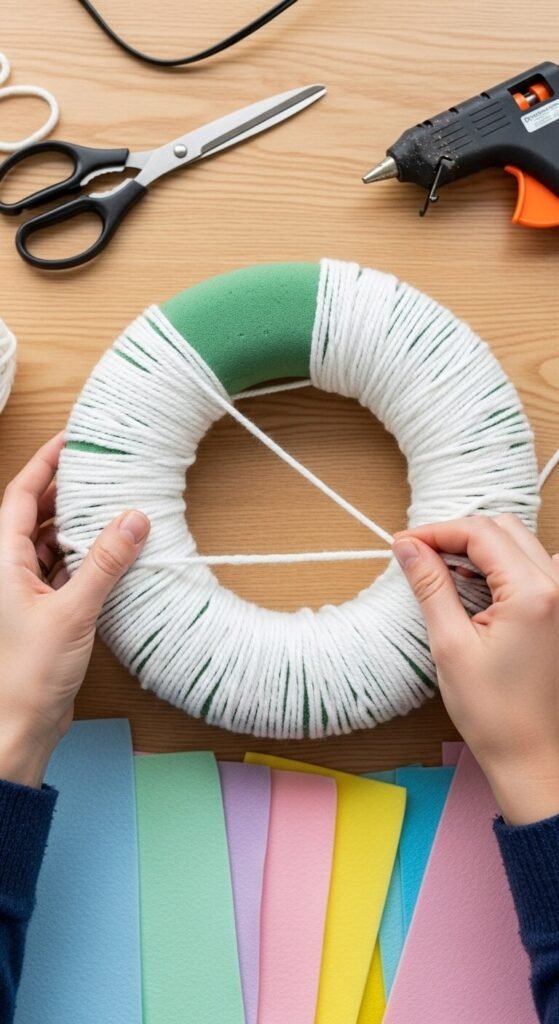
Start by wrapping your wreath form. If you’re using a grapevine wreath, you can skip this step since the natural texture adds a lovely rustic look on its own. For a foam wreath, wrap it tightly with white yarn or strips of faux fur fabric, securing as you go with hot glue.
Once wrapped, let it dry completely before moving on. A lumpy or loose base will make the rest of the steps trickier.
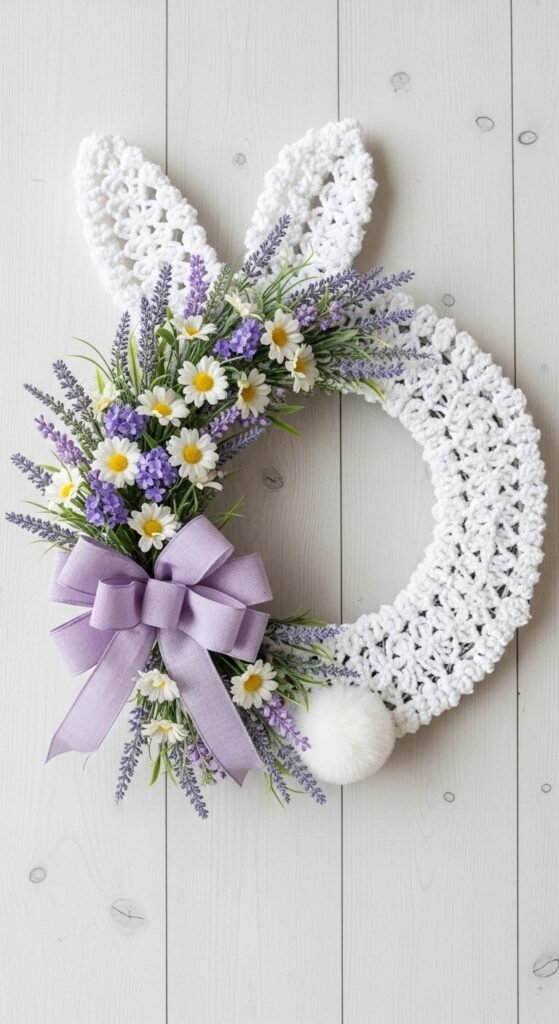
Step 2: Create the Bunny Ears
This is the step that transforms a simple wreath into something magical. Cut two large ear shapes from white felt or faux fur — aim for about 8–10 inches tall. Then cut two slightly smaller inner ear pieces from pink felt and glue them centered onto the white pieces.
Attach the ears to the top of your wreath at a slight angle (not perfectly straight — a little tilt makes them look more playful and lifelike). Hold them in place with generous hot glue and let them set for a few minutes before releasing.
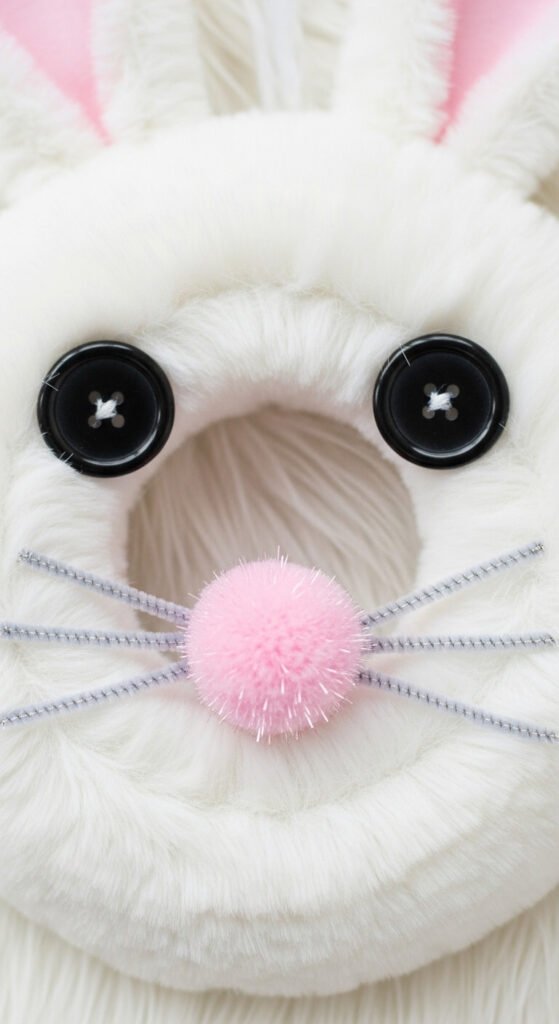
Step 3: Add the Face
Now for the fun part — giving your bunny some personality!
Glue two googly eyes or black buttons slightly below center on the wreath
Add a small pink pom-pom for the nose just below the eyes
Use black pipe cleaner or a thin marker to create whiskers
Optional: add a tiny “U” shape in pink felt for a sweet little smile
Keep the face simple. Less really is more here, and a minimalist bunny face reads as more charming than an overcrowded one.
Step 4: Decorate with Florals and Ribbon
Here’s where your wreath goes from cute to jaw-droppingly cute. Tuck faux spring flowers around the bottom third of the wreath, clustering them together for a lush, abundant look. Lavender, baby’s breath, and small daisies work especially well.
Tie a generous bow from your pastel ribbon and attach it just below the chin area or at the base of one ear. A wired ribbon holds its shape best, but any ribbon you love will work.
Finally, glue your large white pom-pom tail to the very bottom back of the wreath — peek-a-boo style, so it’s just visible from the front.
Tips for Making It Last
Store it carefully. A wreath storage bag keeps it dust-free and shape-intact year after year.
Keep it out of direct rain. Faux fur and felt don’t love moisture — use a covered doorway or bring it inside on wet days.
Refresh it annually. Swap out faded flowers or a worn ribbon to give it a brand-new look next spring without starting from scratch.
Your New Favorite Easter Tradition
Making a bunny wreath is one of those crafts that feels like a little act of joy — for you and for everyone who walks past your front door. It takes just a couple of hours, costs under $20 with smart shopping, and delivers serious springtime charm.
Save this article, pin it for later, and share it with your crafty friends — because every front door deserves a bunny this Easter