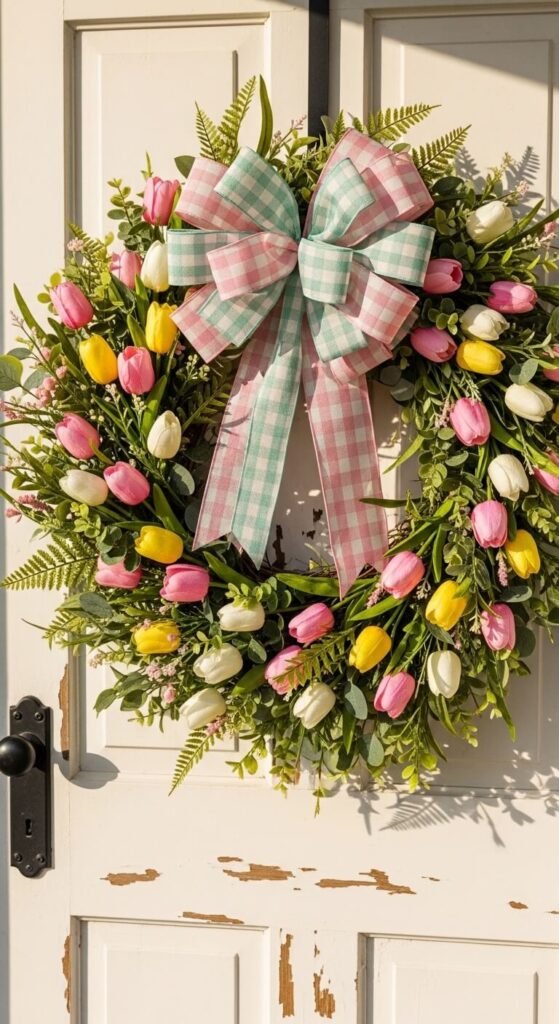
There’s something about a perfectly fluffy bow that can transform a plain wreath into something that looks straight off a designer’s front door — and the best part? You can absolutely make one yourself.
Whether you’re decking out your entryway for Easter, freshening up a seasonal wreath, or adding a handmade touch to a gift basket, a spring bow is the secret ingredient that pulls everything together. Don’t let those elaborate, multi-loop bows intimidate you. With a little ribbon, some wire, and this step-by-step guide, you’ll be making them like a pro in no time.
What You’ll Need Before You Start
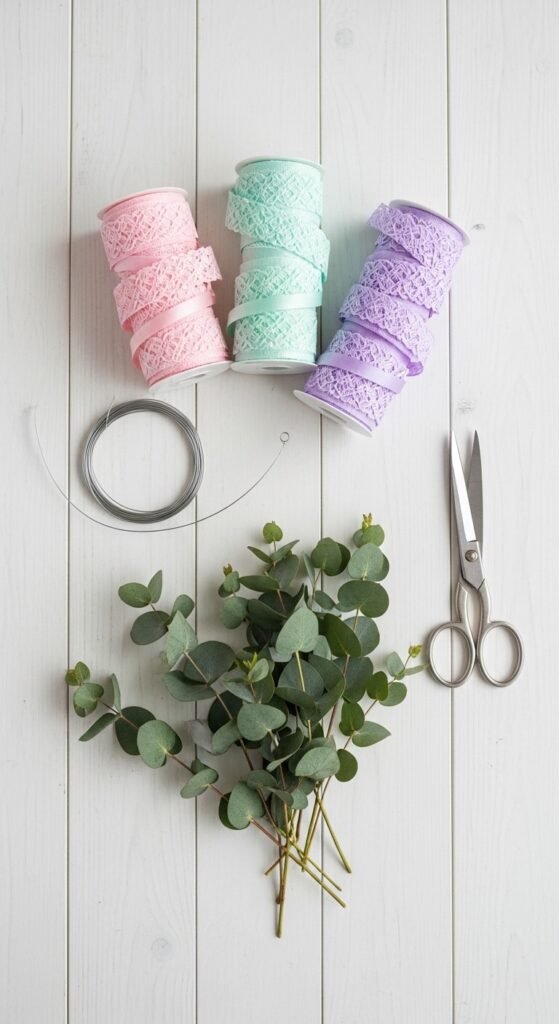
Gather your supplies so everything is within reach. You don’t need much — just the right materials.
Ribbon — Choose 2–3 different ribbons for texture and depth. Wired ribbon works best because it holds its shape.
Floral wire or pipe cleaners — To secure the center of your bow.
Wire cutters or scissors — Sharp ones make clean cuts.
A ruler or your hand — For consistent loop sizing.
Best ribbon choices for spring:
Wired satin ribbon in blush, lavender, or mint
Burlap ribbon with a floral or gingham print
Sheer organza ribbon for an airy, dreamy look
Buffalo check in pastel tones
Step 1: Cut Your Ribbon Lengths
Start by deciding how big you want your bow. For a wreath bow, you’ll generally want loops that are 4–6 inches long.
For a medium bow: cut about 2–3 yards of ribbon total
For a large, dramatic bow: use 4–5 yards
Leave a tail of about 8–10 inches on each end — these hang down and give the bow that classic, finished look. Don’t cut the ribbon off the spool yet if you’re layering multiple loops; work directly from the spool and cut at the end.
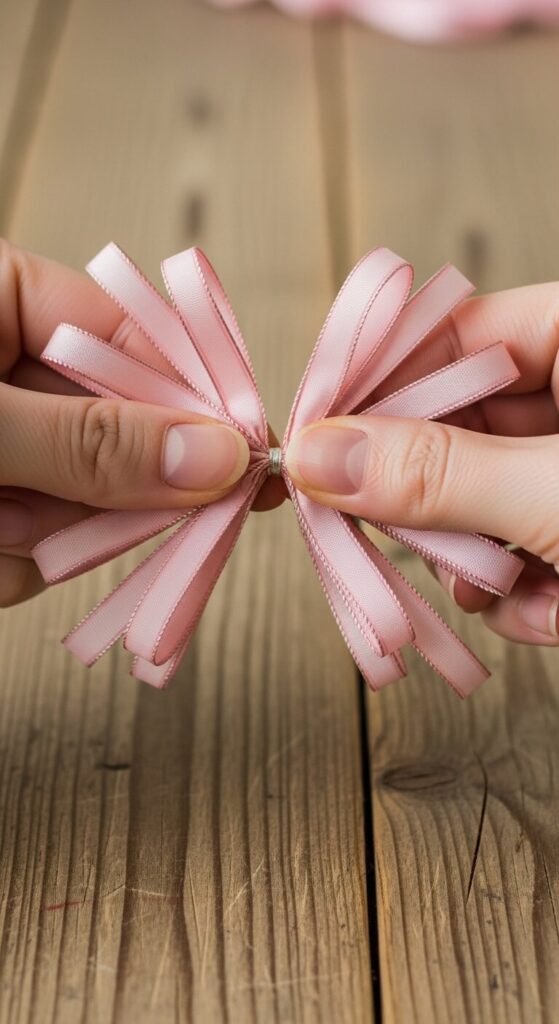
Step 2: Make Your Loops
This is where the magic happens. Here’s the easiest method:
Pinch the ribbon between your thumb and forefinger where you want the center of the bow to be.
Make a loop by bringing the ribbon up and back to center — hold it in place with the same fingers.
Flip and repeat on the other side to create a matching loop.
Keep alternating sides, adding loops as you go. Aim for 4–6 loops per side for a full, lush look.
As you add each loop, gather and pinch the center tightly.
Don’t worry if it looks a little messy at this stage. Bows always look chaotic before they’re wired.
Step 3: Secure the Center
Once you have enough loops, it’s time to lock everything in place.
Cut a 6-inch piece of floral wire.
Thread it through the center loop of your bow.
Twist the wire tightly at the back — two or three solid twists are enough.
Don’t cut the wire tails yet; you’ll use them to attach the bow to your wreath.
This is the step that transforms a floppy pile of loops into an actual bow.
Step 4: Fluff and Shape
Now for the satisfying part — fluffing!
Gently pull each loop outward and adjust until it’s round and full.
Alternate which direction loops face for a more dimensional look.
Twist sheer or organza loops slightly to add visual interest.
Fan the ribbon tails and cut them at an angle or a “V” notch for a polished finish.
Take your time here. A little extra shaping makes a huge difference.
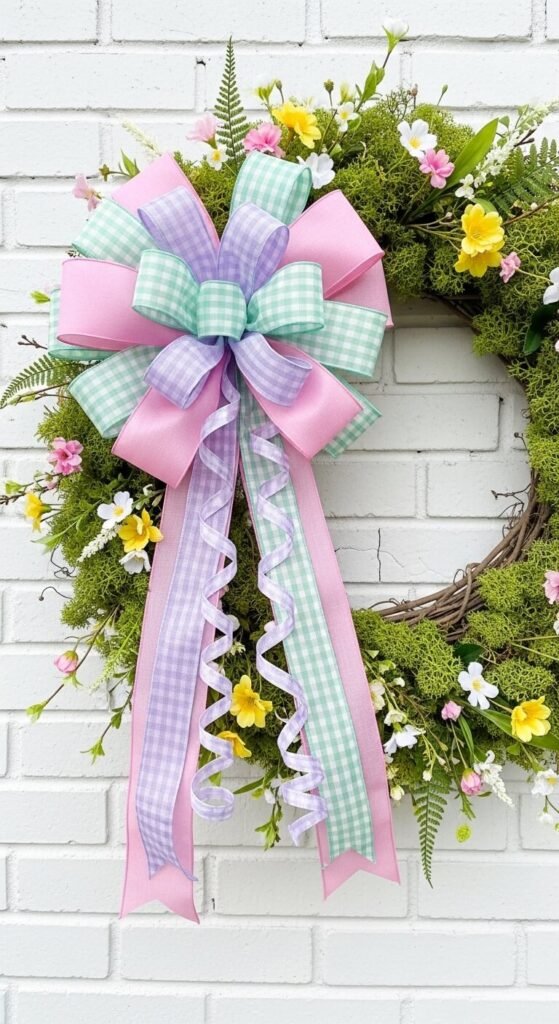
Step 5: Attach It to Your Wreath
Use those wire tails from Step 3 to secure your bow directly onto the wreath frame. Thread one wire end through the wreath in one direction and the other in the opposite direction, then twist them together tightly at the back. Tuck any excess wire out of sight.
For extra security — especially if your wreath will be outdoors — add a dab of hot glue to the back of the bow center before pressing it into place.
Pro Tips for a Pinterest-Worthy Bow
Layer two ribbon types for more texture — try a wide wired ribbon as the base and a narrower printed ribbon on top.
Odd numbers look fuller: aim for 7, 9, or 11 loops total rather than even numbers.
Curl the tails by wrapping them around a pencil for a whimsical touch.
Store unused bows loosely in a box — never stuffed in a bag where they’ll get crushed.
You’ve Got This!
Making a spring bow really is one of those skills that sounds harder than it is. After your first one, you’ll wonder why you ever bought pre-made bows. The beauty of a handmade bow is that you can match it perfectly to your wreath, your front door color, or your entire spring decor palette.
Save this tutorial for your next seasonal refresh — and don’t forget to make a few extras to share! Once your friends see that bow on your wreath, they’re going to want one of their own.