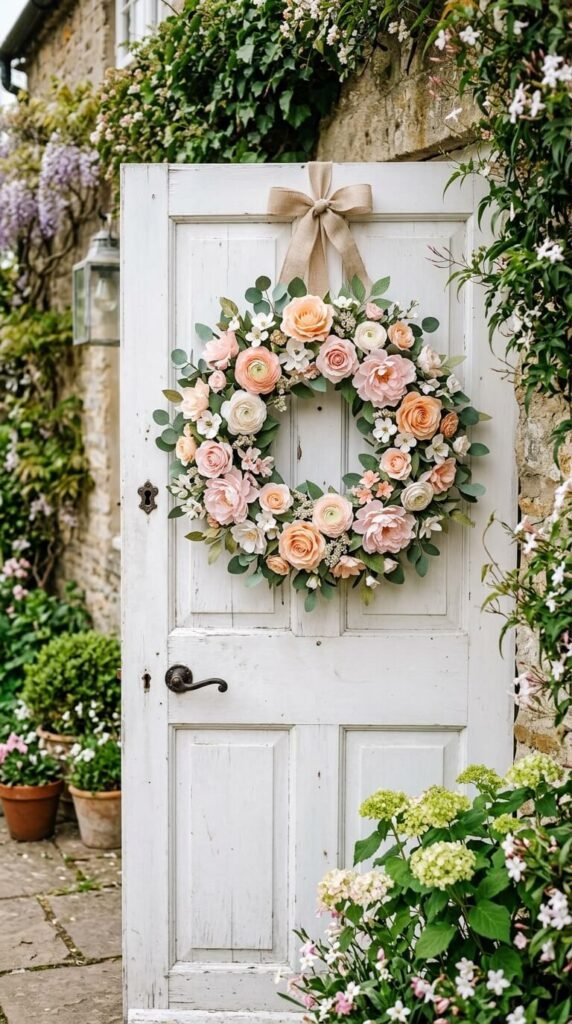
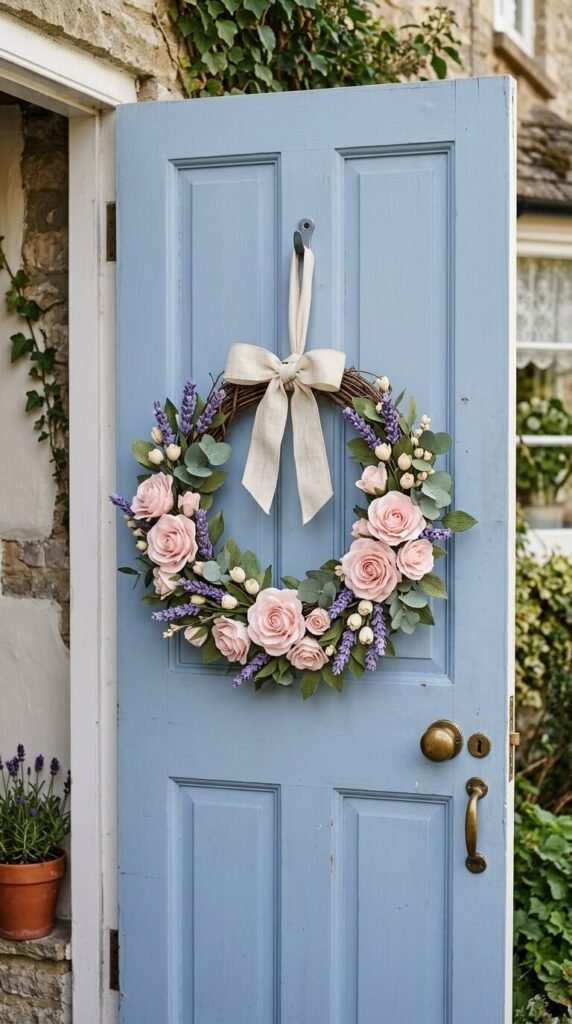
Spring is knocking at the door, and there’s no better way to welcome it than with a gorgeous paper flower wreath hanging on your front door. The best part? You don’t need a craft degree or a trip to an expensive boutique — just some cardstock, a little patience, and this step-by-step guide. Whether you’re a seasoned crafter or a total beginner, this project is seriously satisfying.
What You’ll Need
Before you dive in, gather your supplies. Most of these are easy to find at any dollar store or craft shop:
- Cardstock or crepe paper in spring shades — think blush pink, lavender, soft yellow, and white
- A grapevine or foam wreath base (12–14 inches works great)
- Hot glue gun and glue sticks
- Scissors or a craft cutting mat with a rotary cutter
- Floral wire (optional, but helpful for stems)
- A pencil for tracing petal templates
- Greenery accents — paper leaves, dried eucalyptus, or faux sprigs
Pro tip: Crepe paper gives flowers a soft, realistic texture, while cardstock creates a bolder, more graphic look. Mix both for a layered, dimensional effect.
Step 1 — Make Your Paper Flowers
This is where the magic happens. You’ll want to make at least 12–15 flowers in varying sizes to fill out the wreath nicely.
For simple rolled roses:
- Cut a long spiral strip from a circle of cardstock (like peeling an apple)
- Starting from the outer end, roll it inward tightly
- Secure the base with a dab of hot glue and fan out the petals slightly
For layered peony-style flowers:
- Cut 4–6 petal shapes in graduating sizes
- Layer them from largest to smallest, securing each layer with glue
- Pinch the center slightly for a natural, open-bloom look
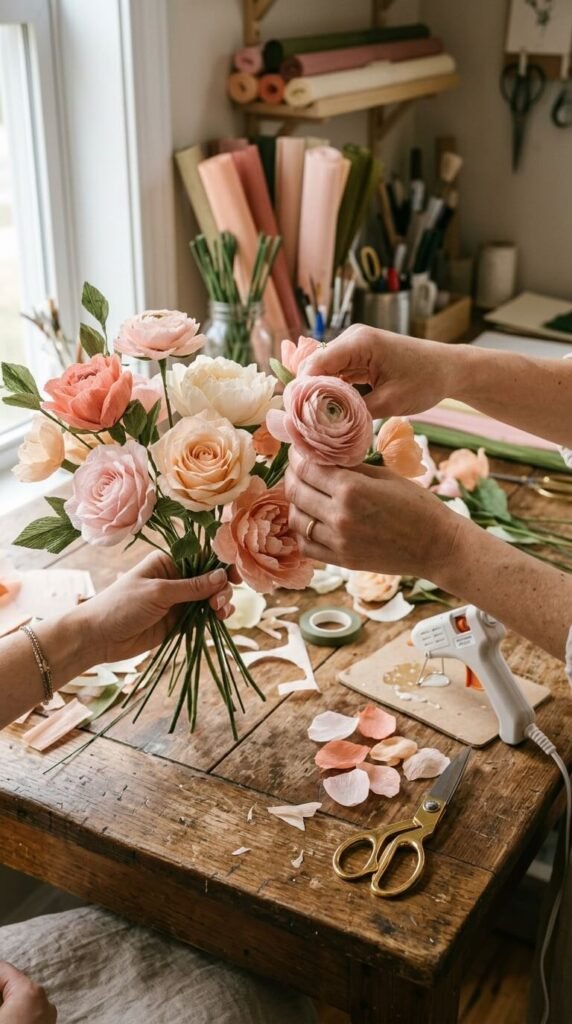
Make a variety — some tight and budded, some open and full. This mix of shapes is what gives the wreath that lush, garden-fresh feel.
Step 2 — Create Paper Leaves and Greenery
No flower arrangement is complete without a little green. Cut simple leaf shapes from sage green or olive cardstock. To add dimension:
- Score a line down the center of each leaf with your scissors and gently fold to create a natural vein
- Curl the edges slightly over a pencil for a lifelike look
- Make small clusters of 3–5 leaves to tuck between blooms
If you want extra texture, mix in a few sprigs of dried baby’s breath or real eucalyptus — it pairs beautifully with paper flowers and adds a subtle fragrance.
Step 3 — Arrange and Glue to the Wreath Base
Now comes the fun part — putting it all together!
Start by laying your flowers and greenery out on a flat surface and experimenting with placement before gluing anything down. A good rule of thumb:
- Place larger blooms first as anchor points, spacing them evenly around the wreath
- Fill gaps with smaller flowers and buds
- Tuck leaves under and between flowers so they peek out naturally
- Leave a small section at the bottom slightly fuller — it gives the wreath a classic cascading effect
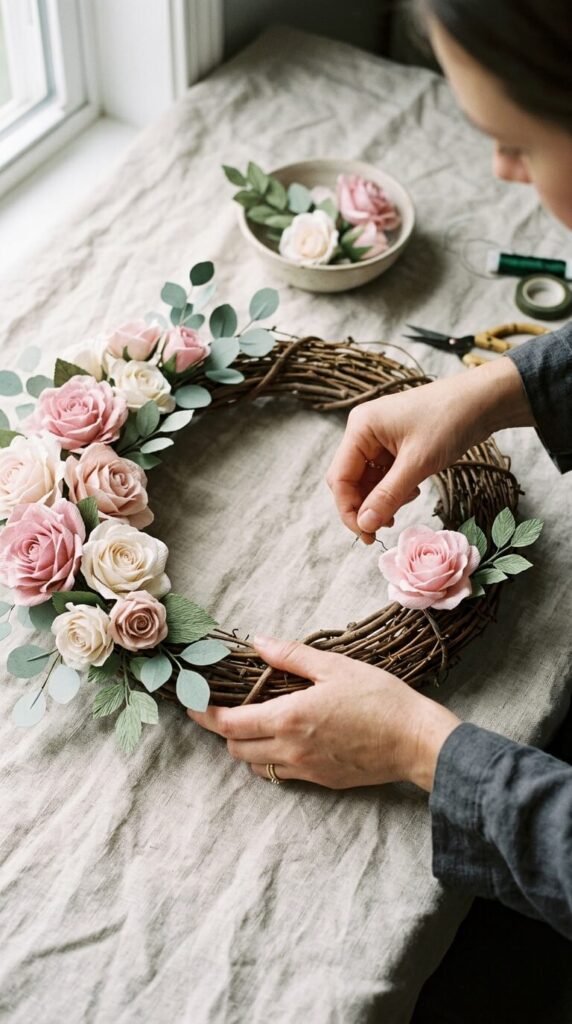
Once you’re happy with the layout, hot glue each piece down firmly. Hold each flower in place for 10–15 seconds to let it set.
Step 4 — Add the Finishing Touches
The little details make all the difference:
- Add a ribbon or bow in gingham, linen, or velvet at the bottom or top
- Tuck in a few butterflies cut from patterned paper for a whimsical touch
- Spray lightly with matte sealer to protect the paper from humidity
Tips to Make Your Wreath Last
- Store it flat in a box when not in use to avoid crushing the blooms
- Keep it away from direct rain — paper and moisture aren’t friends
- A light coat of Mod Podge on the petals adds extra durability
Bring Spring to Your Door
A handmade paper flower wreath is one of those projects that looks like it took way more effort than it did — and that’s exactly why it’s so rewarding. You get a one-of-a-kind piece that reflects your style, costs a fraction of store-bought options, and lasts all season long.
Save this tutorial for your next crafty weekend, and don’t forget to share your finished wreath — we’d love to see how yours turns out!