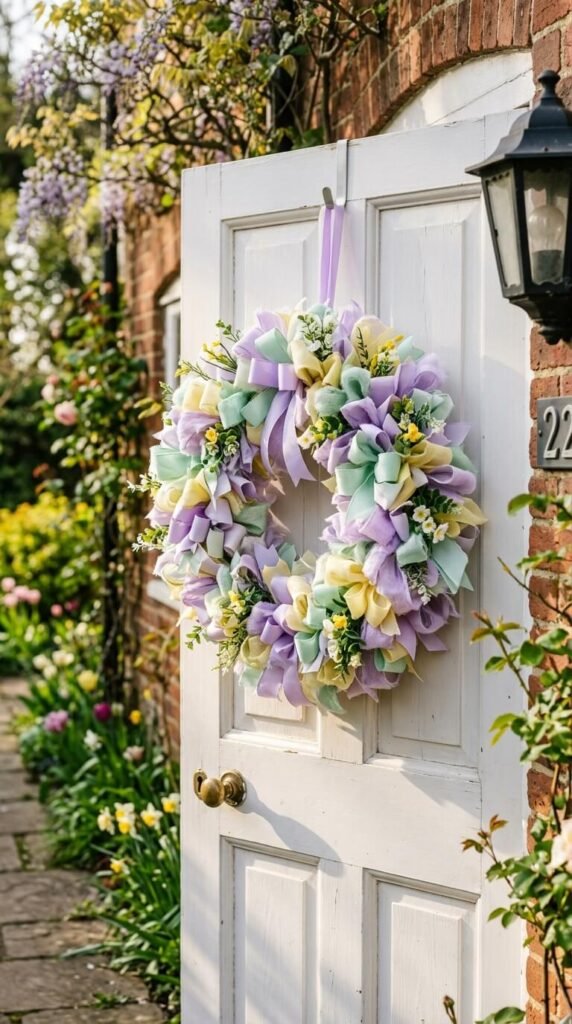
Spring is knocking at the door, and there’s no better way to answer it than with a big, fluffy ribbon wreath hanging on your front door. This project is one of those rare crafts that looks like it took hours but actually comes together in an afternoon — no glue gun burns required. Whether you’re a total beginner or a seasoned DIYer, this tutorial will walk you through everything you need to know to create a wreath that’s bursting with texture, color, and serious curb appeal.
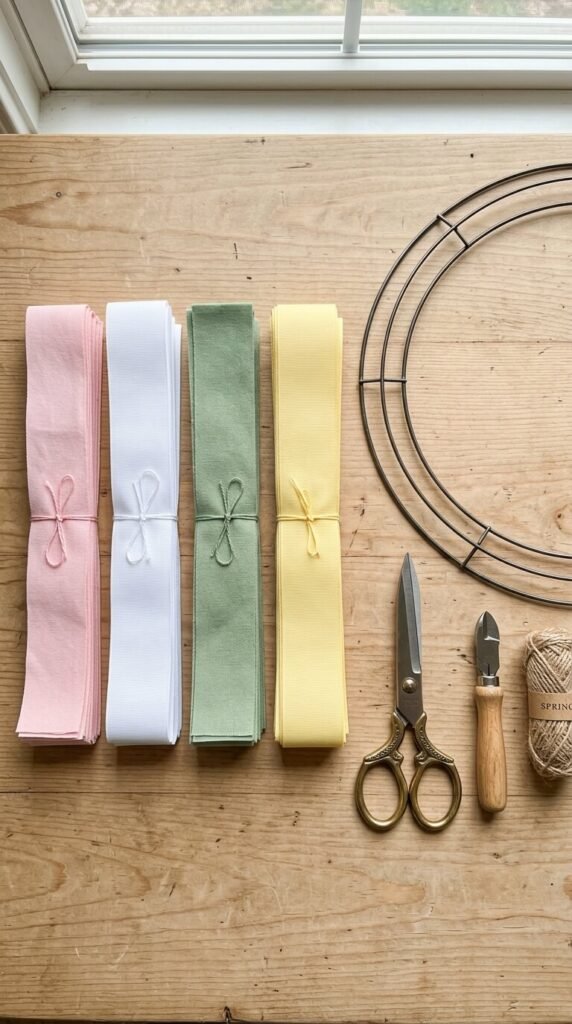
What You’ll Need
Before you dive in, gather your supplies. The good news? This project is budget-friendly and the materials are easy to find at any craft store.
- Wire wreath frame (14- or 16-inch works best for a full, fluffy look)
- Ribbon — at least 3–4 different colors or patterns, each spool about 25 yards
- Scissors
- Optional: floral picks, faux flowers, or greenery sprigs for extra dimension
A few tips on ribbon selection: go for a mix of satin, grosgrain, and wired ribbon for the best texture variety. Wired ribbon in particular holds its shape beautifully and adds that airy, puffed-out volume that makes the wreath look so full. Aim for widths between 1.5 and 2.5 inches — too narrow and the wreath looks sparse, too wide and it gets stiff.
How to Cut and Prep Your Ribbons
This step sets the whole project up for success, so don’t rush it.
Cut each ribbon into strips about 10–12 inches long. You’ll need a lot — plan for roughly 200 strips total to get that satisfying fluffiness. It sounds like a lot, but once you get into a rhythm, cutting goes fast. Put on a podcast and get snipping.
Pro tip: Cut all your strips before you start tying. Having them ready in sorted color piles makes the tying process smooth and lets you plan your color distribution as you go.
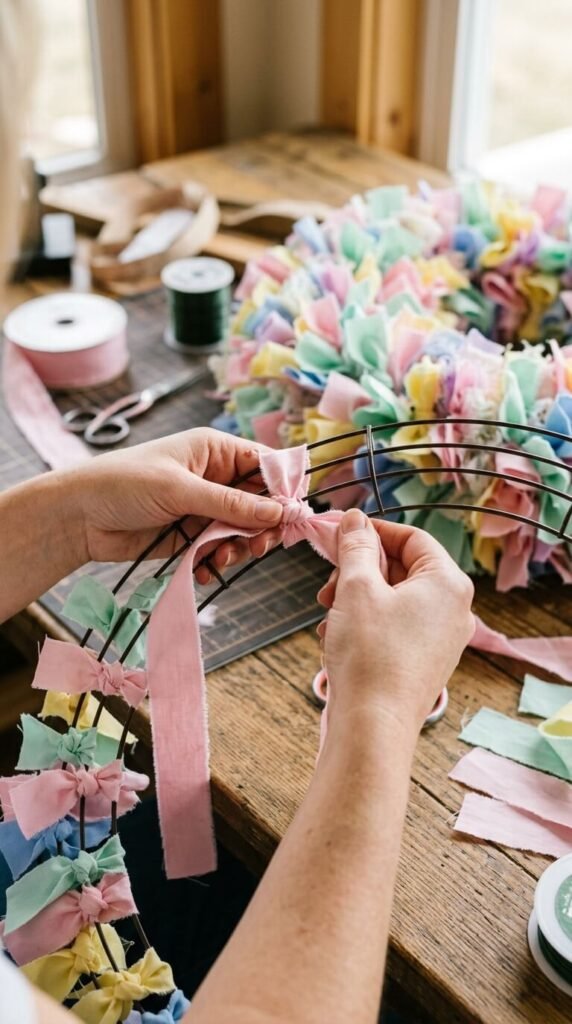
The Tying Technique That Creates Maximum Fluff
Here’s where the magic happens. The secret to a truly fluffy wreath isn’t fancy knots — it’s a simple lark’s head knot, also called a folded loop tie.
Here’s how to do it:
- Fold a ribbon strip in half so the two ends meet.
- Push the folded loop through one of the wire sections on your frame.
- Pull the two loose ends through the loop and tug snug — not tight.
- Fluff the ends outward so they fan away from the frame.
That’s it. Repeat this for every single strip, working your way around the frame. Pack them in close together — the more crowded the knots, the fluffier the finished wreath. Leave no wire showing between ties.
Building Color Flow Around the Wreath
You have two great options for laying out your colors:
- Random mix — Grab strips without looking and tie them on. This creates a wildly playful, garden-party look that feels effortlessly casual.
- Planned sections — Group similar colors in arcs around the wreath for a more intentional, ombre-style effect. Think transitioning from cream to blush to coral as you move around the circle.
Neither approach is wrong. Just commit to one before you start, because switching mid-wreath leads to a headache.
Fluffing and Finishing Touches
Once all your strips are tied on, hold the wreath up and give it a good shake. Then spend a few minutes pulling and separating the ribbon ends so they point outward in every direction rather than lying flat. This step alone takes a mediocre wreath to a wow wreath.
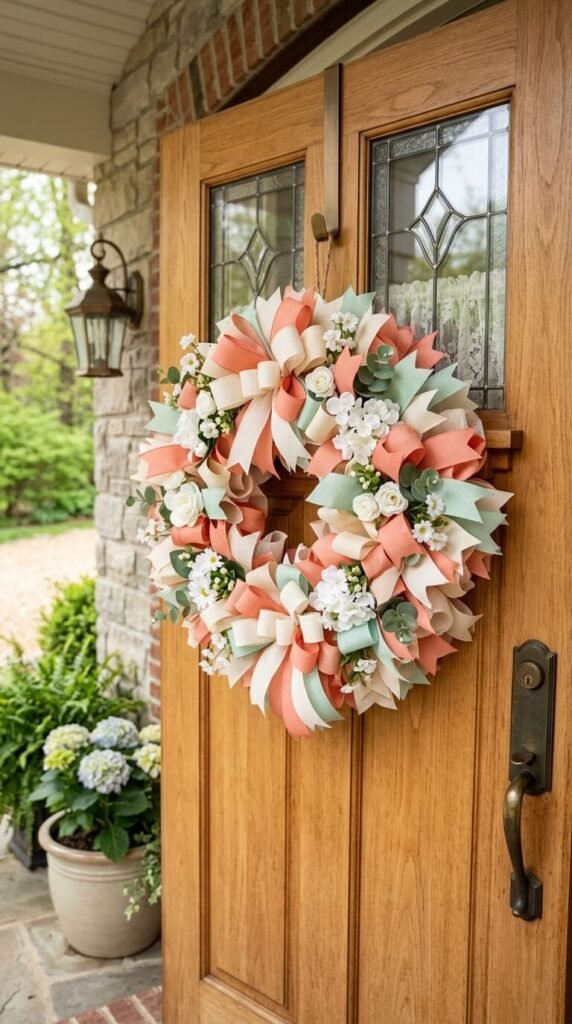
If you’re adding embellishments, now’s the time:
- Tuck in faux flower stems by weaving them through the ribbon knots
- Add a few greenery sprigs for a fresh, garden feel
- Wire on a small decorative sign or initial letter in the center
Finish with a ribbon loop tied to the top wire for hanging, or use a simple wreath hanger over the door.
A Few Common Mistakes to Avoid
Even simple projects have their pitfalls. Watch out for these:
- Tying too loosely — Knots that slide around the frame will shift and create uneven gaps over time. Snug (not strangling) is the sweet spot.
- Not enough strips — Skimping on ribbon is the number-one reason wreaths look thin. When in doubt, cut more strips before you start.
- Only one ribbon type — Using just one kind of ribbon (say, all satin) makes the wreath look flat. Mix at least two textures for depth.
Your Fluffy Spring Wreath Awaits
A ribbon spring wreath is one of those projects that delivers a big payoff for a small investment of time and money. Once you make your first one, you’ll want to make one for every season — and you’ll absolutely want to make a few as gifts.
Save this tutorial for your next craft afternoon, share it with a friend who loves a good DIY project, and don’t forget to tag your finished wreath when you make it. Happy crafting!