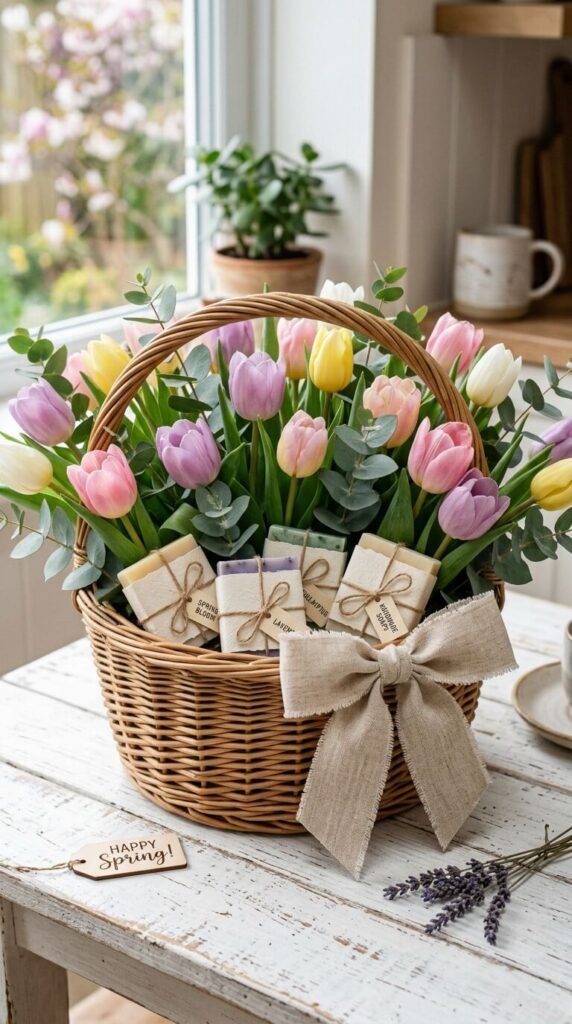
There’s something about a handmade spring basket that no store-bought gift can compete with. It feels personal, seasonal, and thoughtful — the kind of thing people actually remember. Whether you’re putting one together for a birthday, a hostess gift, Mother’s Day, or just because, a spring basket arrangement is one of the easiest DIY projects that looks like you put in ten times the effort. Here’s everything you need to know to make one that’s genuinely beautiful.
What You’ll Need Before You Start
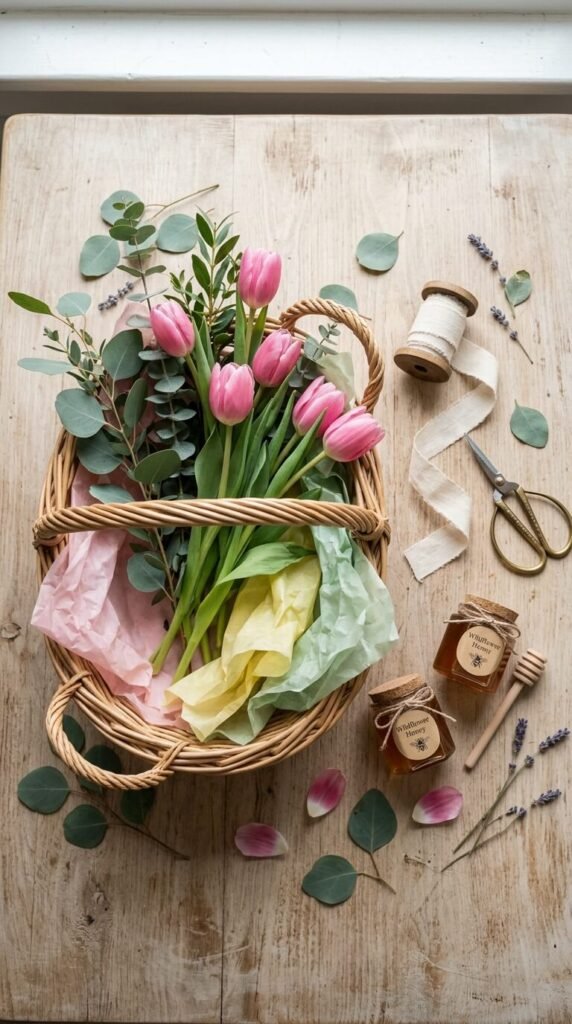
The beauty of this project is that it’s flexible — you can spend $15 or $50 depending on the look you’re going for. Here’s a solid starting list:
- A basket — wicker, wire, or even a wooden crate works great
- Floral foam or crumpled tissue paper (to anchor and fill the base)
- Fresh or faux flowers — tulips, ranunculus, daisies, or peonies are perfect for spring
- Greenery — eucalyptus, ferns, or ivy add fullness and a natural feel
- Filler items — wrapped candles, small jars of honey or jam, bath salts, or chocolates
- Ribbon or twine for finishing the handle
- Tissue paper or shredded paper in a coordinating color
You don’t need every single thing on this list. Even just flowers, greenery, and one or two small gifts make a genuinely lovely basket.
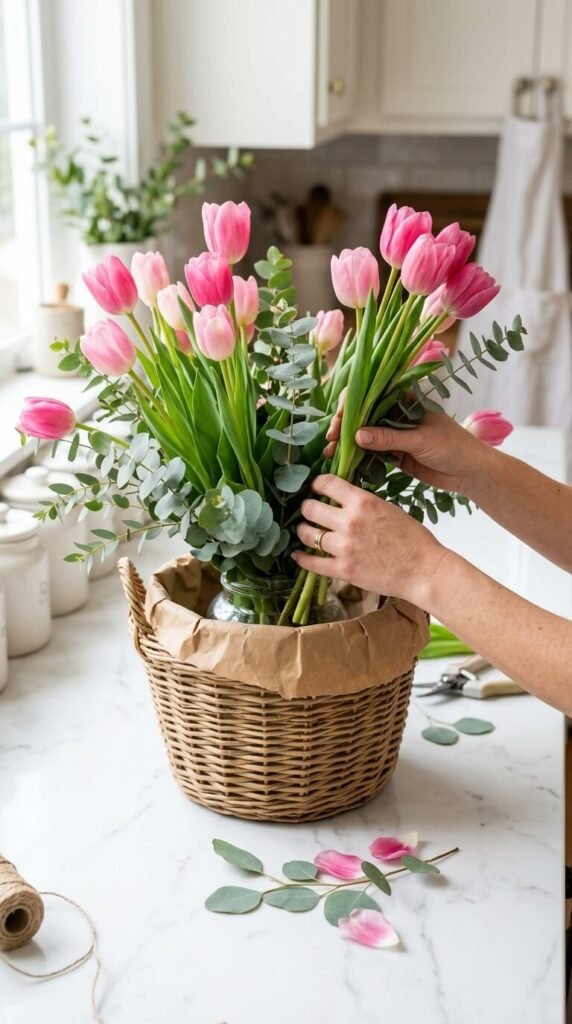
Step 1: Build Your Base
Start with your basket and line the bottom with tissue paper or crumpled kraft paper. This serves two purposes: it adds a pop of color and it lifts your items so they sit higher and look more abundant.
If you’re using fresh flowers, press a block of floral foam (soaked in water first) into the bottom. This keeps stems hydrated for several days. For faux flowers or a dry arrangement, crumpled tissue paper alone works perfectly.
Pro tip: Layer two colors of tissue paper — one solid, one patterned — and let the edges peek over the rim of the basket for a polished look.
Step 2: Place Your Tallest Items First
Think of your basket like a floral arrangement — height creates drama. Place your tallest items in the back or center first. This could be a tall candle, a bunch of tulips, or a small potted herb like rosemary or lavender.
Work forward and outward from there, tucking in smaller items as you go. The goal is a slightly domed, layered look — not everything at the same height.
Step 3: Fill in With Greenery and Filler Items
Once your main items are in place, this is where greenery works magic. Tuck eucalyptus, fern fronds, or leafy stems around the edges and between items. It fills gaps, softens the look, and makes the whole thing feel lush and intentional.
Now add your gift items:
- Small soaps, bath bombs, or a lip balm
- A mini candle or wax melt
- A jar of honey, jam, or infused olive oil
- A small notebook or seed packets for the gardener in your life
- Chocolate or individually wrapped candies
Nestle these between the florals so they feel discovered rather than just placed.
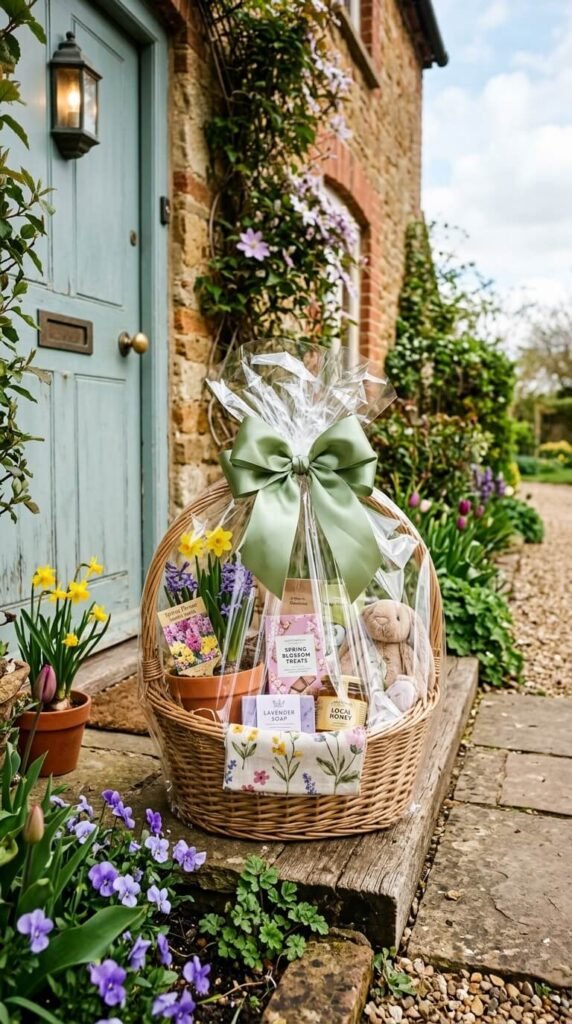
Step 4: Add the Finishing Touches
This step is what takes a basket from nice to really nice.
- Tie a ribbon around the handle in a full bow — grosgrain, satin, or natural twine all look beautiful
- Wrap the whole basket in clear cellophane and tie the top with a ribbon if you’re transporting it
- Add a handwritten tag — even a small card with a few words makes the gift feel complete
- Tuck in a sprig of dried lavender or baby’s breath for a delicate finishing detail
Quick Customization Ideas
One of the best things about spring baskets is how easily you can theme them:
- Garden lover: seed packets, gardening gloves, a small trowel, herb starts
- Self-care: bath salts, a face mask, a candle, and a soft washcloth
- Foodie: jams, honey, artisan crackers, and a small cutting board
- New mom: calming teas, a linen burp cloth, lavender lotion, and a soft toy
Mix and match based on who you’re making it for — that’s what makes it a gift rather than just a basket.
You’ve Got This
Spring baskets are one of those gifts that look impressive but are genuinely approachable to make, even if you’ve never done anything like this before. The key is layering — height, texture, color — and letting the season do the work. Soft colors, fresh greenery, and a few thoughtful extras are all you need.
Save this for your next gifting moment — and share it with someone who loves giving beautiful, handmade gifts!