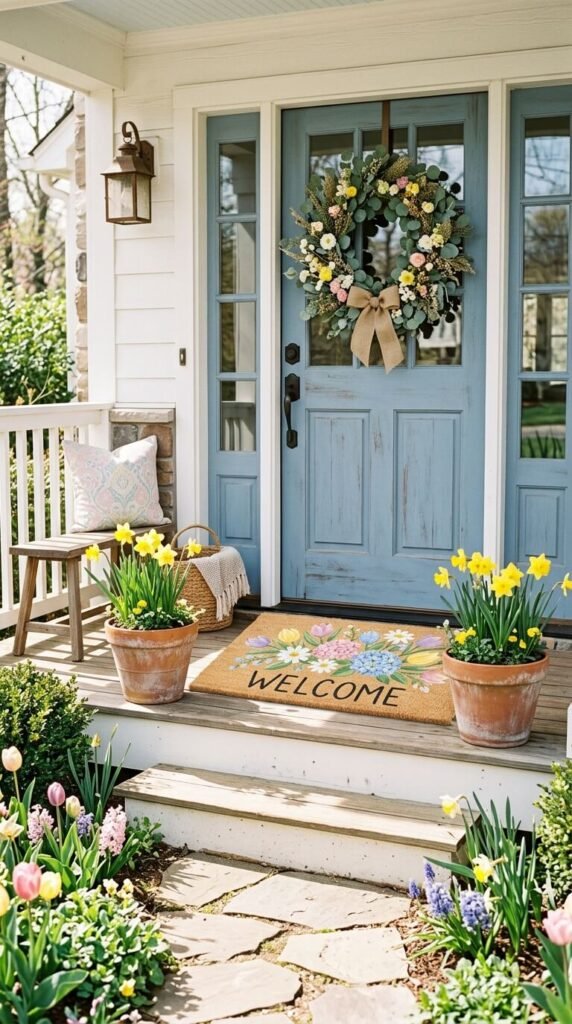
Your front door is the first thing guests see — and honestly, the first thing you see every single day. A cheerful, handmade spring door mat costs almost nothing to put together, takes an afternoon, and transforms your entryway from forgettable to front-porch-gorgeous. Ready to get crafty?

What You’ll Need Before You Start
No need to raid a craft store for a cart full of supplies. This project keeps it simple. Here’s your shopping list:
- A plain coir or rubber mat (12×18″ or 18×30″ — whatever fits your door)
- Outdoor acrylic paint in 2–3 spring colors (think soft yellow, sage green, sky blue, or coral)
- Foam brushes or stencil brushes
- Painter’s tape
- A stencil (floral, geometric, or lettering — store-bought or cut from cardstock)
- Outdoor sealant spray (optional but worth it for longevity)
- Drop cloth or old newspaper to protect your workspace
The whole supply run should cost you $15–$25, and most of it you probably already have at home.
Step 1 — Prep Your Mat
Lay your mat flat on a protected surface outside or in a well-ventilated space. Give it a good shake to remove any loose fibers or dust. If you’re working with a natural coir mat, lightly mist it with water first — this helps the paint absorb more evenly and prevents it from beading up on the rough texture.
Use painter’s tape to block off any borders or sections you want to keep clean. This step takes five minutes and saves you from wobbly edges later.
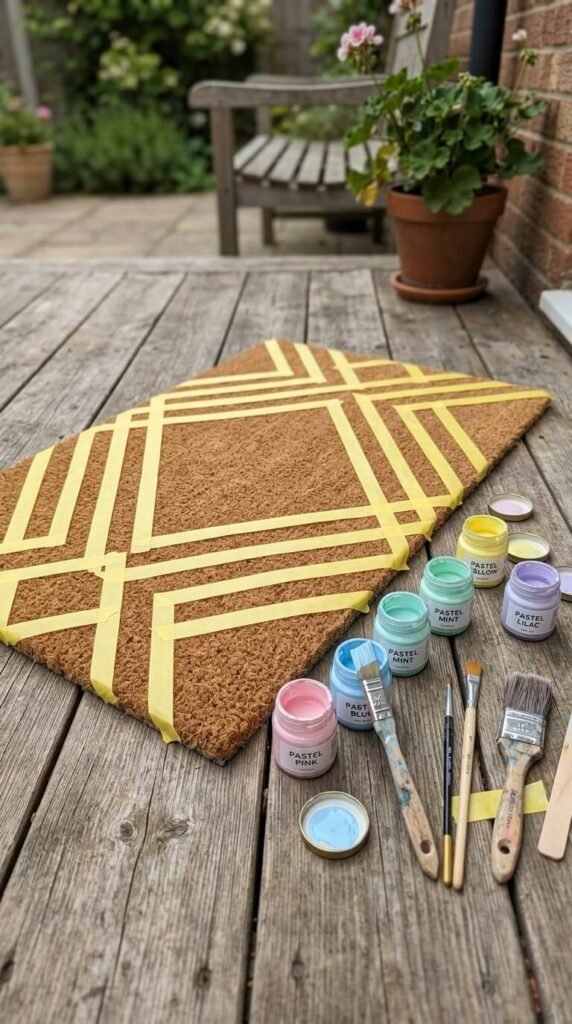
Step 2 — Apply Your Base Design
Now for the fun part. Position your stencil firmly on the mat and hold it down at the edges — coir mats have an uneven surface, so you want good contact. Using a stiff stencil brush, pounce (don’t drag) the paint straight down into the fibers. This blotting motion keeps colors crisp and prevents bleeding under the stencil.
A few tips that make a real difference:
- Work in thin layers — two light coats look better than one thick, gloppy one
- Let each color dry completely before moving your stencil or adding another shade
- Less paint on the brush than you think you need; you can always add more
- Overlapping floral shapes in slightly different sizes give a layered, dimensional look
Spring designs that photograph especially well: simple daisies, tulip silhouettes, scattered dots, or a classic “HELLO” in chunky block letters.
Step 3 — Add Color and Dimension
Once your base design is dry, go back in with a second color to add depth. A pale yellow daisy with a tiny orange center. A sage green leaf with a darker green vein. These small details take two minutes and make the whole thing look intentional and polished.
If you want a more abstract look, skip the stencil entirely and try a simple stripe or checkerboard pattern using only painter’s tape. Alternate between two complementary spring colors for a clean, modern result.

Step 4 — Seal It for the Season
This step is optional, but if your mat lives in a spot that gets rain or direct sun, a coat of outdoor sealant spray will extend the life of your design significantly. Hold the can 10–12 inches away and apply a light, even mist. Let it dry for at least an hour before placing the mat outside.
Even without sealant, a covered porch mat should hold up beautifully for an entire season.
Styling Your Finished Mat
Once your mat is dry and in place, a few finishing touches pull the whole look together:
- Flank it with potted plants — small topiaries, window boxes, or seasonal flowers in coordinating colors
- Layer it over a larger neutral mat for a layered, styled entryway look
- Swap it seasonally — make a summer version, a fall version, and rotate them every few months
A Mat That Means Something
There’s something genuinely warm about walking up to a front door and seeing something handmade. It signals care. It says someone lives here who pays attention to the little things — and that same energy carries right into how guests feel when they step inside.
This project is fast, low-cost, and completely forgiving. If a color looks off, paint over it. If the stencil slipped, lean into the imperfection. The charm of handmade is exactly that.
Save this project for your next slow Saturday morning — a cup of coffee, some outdoor space, and an hour of creative quiet. Your front door will thank you all season long.