If you’ve been scrolling Pinterest looking for a showstopper centerpiece that’s equal parts beautiful and edible, stop right here. An egg wreath is the craft-meets-kitchen project you didn’t know you needed — and once you see one sitting on your Easter table (or honestly, any spring table), you’ll wonder how you ever hosted without it. Whether you go full natural-dye boho or bold and bright, the result is always stunning.
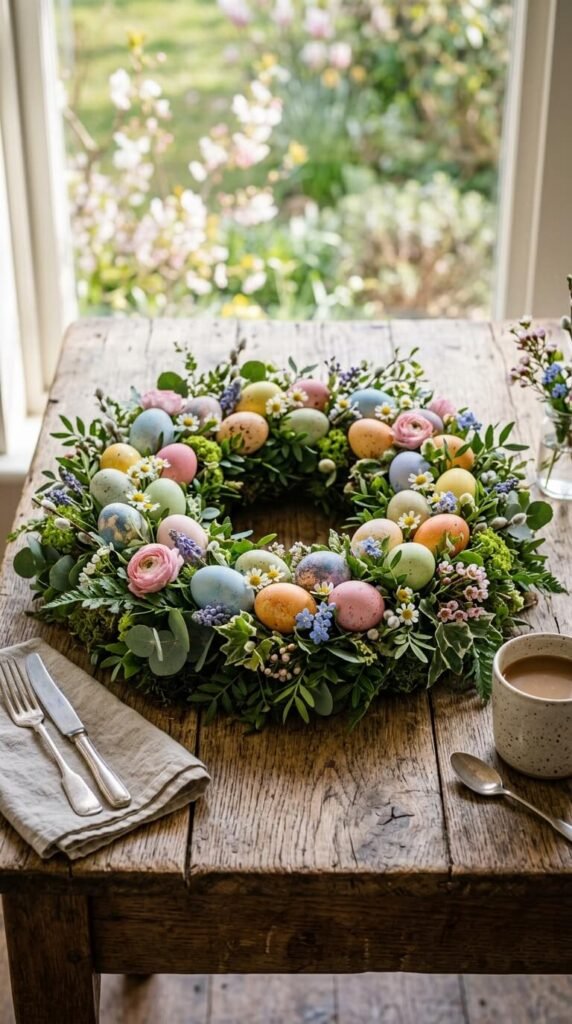
The best part? It’s easier than it looks. Let’s walk through exactly how to pull this off.
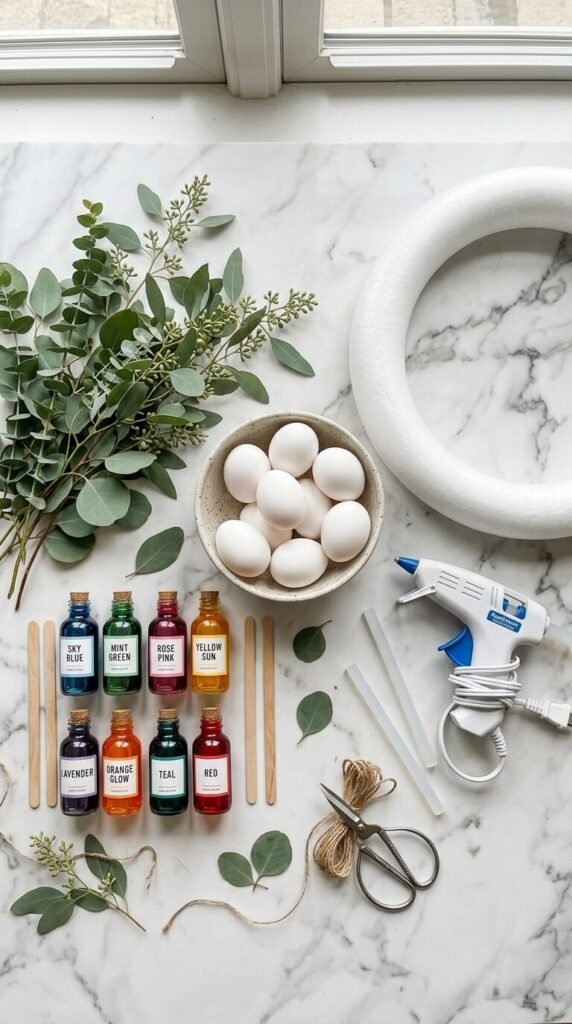
What You’ll Need
Before you start, gather everything so the process is smooth. Here’s your shopping list:
- 12–18 eggs (raw or hard-boiled, depending on your method — see below)
- Egg dye kits or natural dye ingredients (beets, turmeric, red cabbage)
- A foam or grapevine wreath base (10–12 inches works well)
- Hot glue gun and glue sticks
- Fresh or faux greenery (eucalyptus, boxwood, or fern sprigs)
- Optional: ribbon, dried flowers, twine for decorating
Grab a waterproof tablecloth or some newspaper — dyeing eggs is the messiest (and most fun) part of this whole project.
Step 1: Prep Your Eggs
Here’s the big decision upfront: blown eggs vs. hard-boiled eggs.
- Blown eggs last for years. Use a pin to poke holes in each end, then blow out the contents. They’re lighter and wreath-friendly long-term.
- Hard-boiled eggs are faster and easier but will eventually need to be replaced. Great for a one-season wreath.
If you’re making this for a holiday display that will sit out for weeks, go with blown eggs. For a weekend centerpiece or a kids’ project, hard-boiled is totally fine.
Once prepped, let your eggs dry completely before dyeing.
Step 2: Dye Your Eggs
This is where the magic happens. A few tips for gorgeous, even color:
- Add 1 teaspoon of white vinegar to each dye bath for brighter, more saturated color.
- Let eggs sit for at least 5–10 minutes — longer for deeper shades.
- Mix and match: try an ombré palette (light pink to deep raspberry) or a nature-inspired mix (sage green, dusty blue, warm terracotta).
- Dry eggs on a wire rack or egg carton so they don’t flatten on one side.
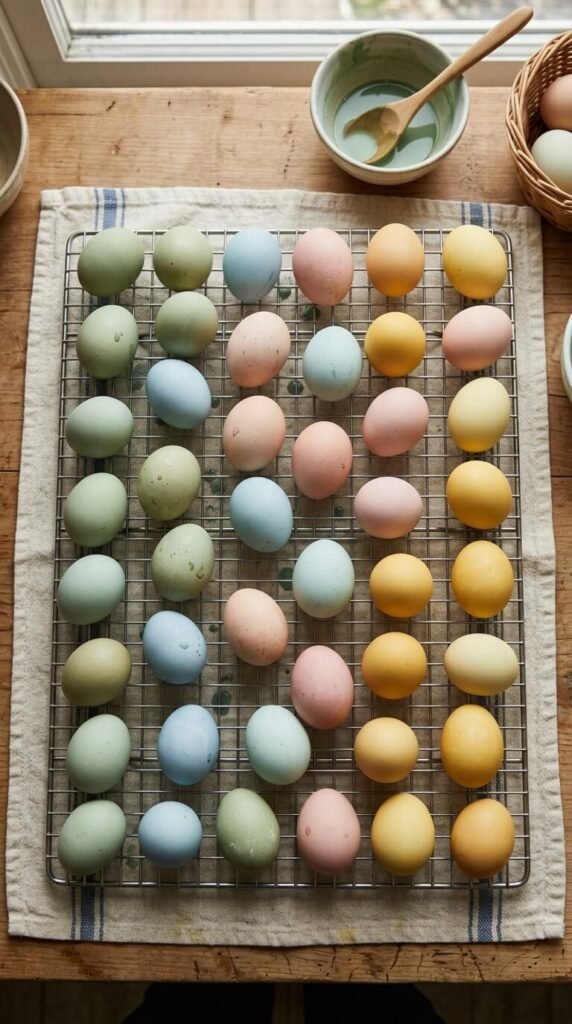
Don’t overthink the “perfect” color scheme — a mix of 3 to 4 coordinating shades always looks intentional and beautiful.
Step 3: Build Your Wreath Base
While your eggs dry, prep the wreath form:
- Cut greenery into small 3–4 inch sprigs.
- Use your hot glue gun to attach greenery all around the wreath base, layering as you go.
- Work in one direction so the sprigs flow naturally.
- Fill in any gaps — you want a lush, full base before a single egg goes on.
If you’re using a grapevine wreath, you can tuck greenery right into the vine without glue, which makes it easy to refresh later.
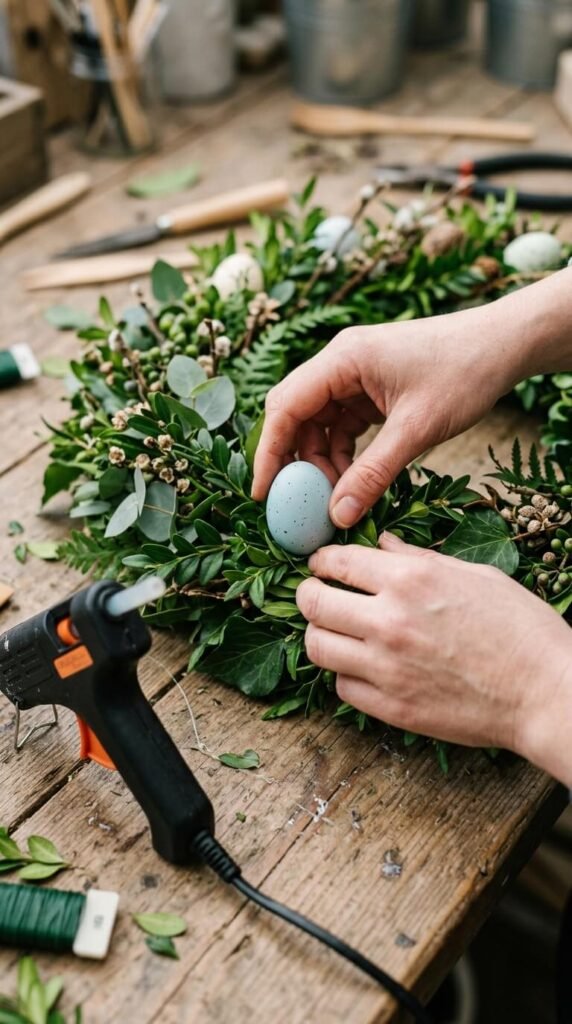
Step 4: Attach the Eggs
Now for the most satisfying step. Apply a generous dot of hot glue to the bottom of each egg and press firmly onto the greenery. Hold for 10–15 seconds until set.
A few placement tips:
- Alternate colors as you go around the wreath — don’t cluster all the same shade together.
- Vary the spacing slightly so it looks handcrafted, not robotic.
- Leave a small gap at the top where you’ll add a ribbon hanger.
Once all the eggs are on, step back and check for any sparse spots. Add extra greenery or a few small dried flowers to fill gaps.
Step 5: Add the Finishing Touches
This is where your wreath goes from pretty to Pinterest-worthy:
- Tie a wide ribbon bow at the top in linen, gingham, or velvet.
- Tuck in a few dried wildflowers or baby’s breath between eggs for texture.
- Add a small nest with a decorative bird for a whimsical touch.
- Hang with a wreath hook or a loop of jute twine.

Display & Care Tips
- Keep your wreath away from direct sun to prevent fading.
- If using hard-boiled eggs, plan to display for no longer than 1–2 weeks.
- Blown-egg wreaths can be stored carefully in a box with tissue paper and reused next year.
- Spritz faux greenery lightly with water to keep it looking fresh if you’re using real sprigs.
You’ve Got This
An egg wreath is one of those projects that looks far more complicated than it actually is — and that’s exactly why it makes such an impressive centerpiece. It’s a perfect weekend afternoon activity, a great kids’ craft (with a little grown-up help on the glue gun), and a genuinely beautiful piece of seasonal décor.
Save this article for your next holiday season and share it with a friend who loves a good craft project! Tag your finished wreath — we’d love to see how it turns out. 🌿🥚