There’s something quietly magical about bringing the outdoors in — and nothing does it quite like a perfectly crafted moss ball sitting on a shelf, windowsill, or centerpiece tray. These soft, earthy spheres are having a serious moment in home decor, and once you make one, you’ll want them everywhere.
The best part? You don’t need a green thumb or a craft room full of supplies. Moss ball decor is beginner-friendly, budget-conscious, and endlessly customizable. Let’s get into it.
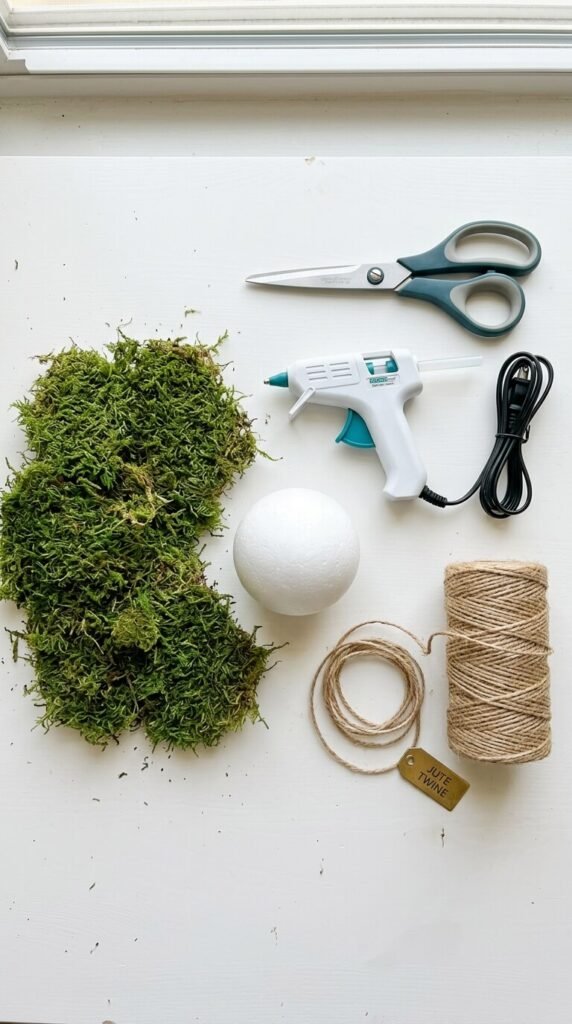
What You’ll Need
Before you dive in, gather your materials. Most of these are available at a craft store, garden center, or even your own backyard.
- Sheet moss or preserved moss (available at craft stores like Michaels or online)
- Floral foam balls or Styrofoam balls in your preferred size (2–4 inches work great)
- Hot glue gun and glue sticks
- Scissors or small floral shears
- Twine or fishing line (optional, for hanging)
- A shallow bowl or tray for display
You can also use live moss if you plan to keep your moss balls in a humid spot — they’ll stay fresh and even grow slightly over time with a light misting.
Prep Your Moss
If you’re using dried or preserved sheet moss, give it a quick check for any dry, crumbly bits and remove them. You want pliable, full pieces that will wrap smoothly around the ball.
- Tear or cut the moss into palm-sized sections — not too small, not too large
- If the moss feels stiff, lightly mist it with water and let it sit for 5 minutes
- Keep a variety of thick and thin pieces on hand so you can fill gaps easily
Working with flexible moss makes the whole process smoother and gives you a more natural, organic finish.
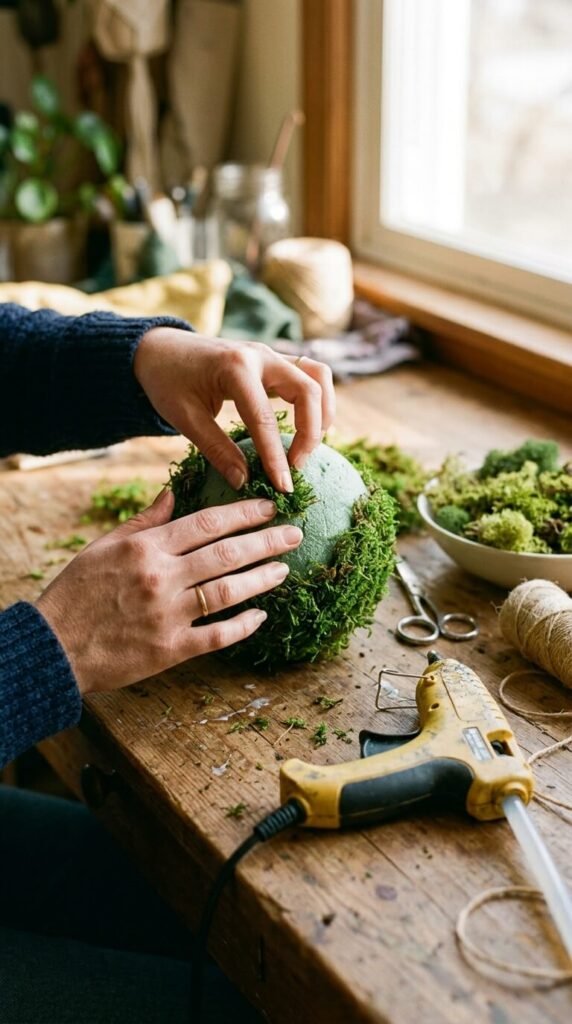
How to Make the Moss Ball
This is the fun part. It’s a bit like wrapping a present — satisfying once you get into a rhythm.
- Start with a base layer. Apply a few dots of hot glue to your foam ball, then press a piece of moss firmly against it. Hold for a few seconds until it sets.
- Work in sections. Move around the ball, overlapping pieces slightly as you go. Think of it like tiling — you want full coverage with no foam peeking through.
- Tuck and press. For edges and curves, fold the moss gently and use extra glue to secure it. Don’t rush this step.
- Fill in the gaps. Use smaller pieces of moss to patch any bare spots. A toothpick can help press moss into tight areas.
- Trim if needed. Once fully covered, use scissors to snip any unruly bits sticking out too far.
The whole process takes about 15–20 minutes per ball once you get the hang of it.
Display Ideas That Feel Fresh and Intentional
A moss ball on its own is lovely. A few styled together? Stunning. Here’s how to make your display feel curated, not cluttered.
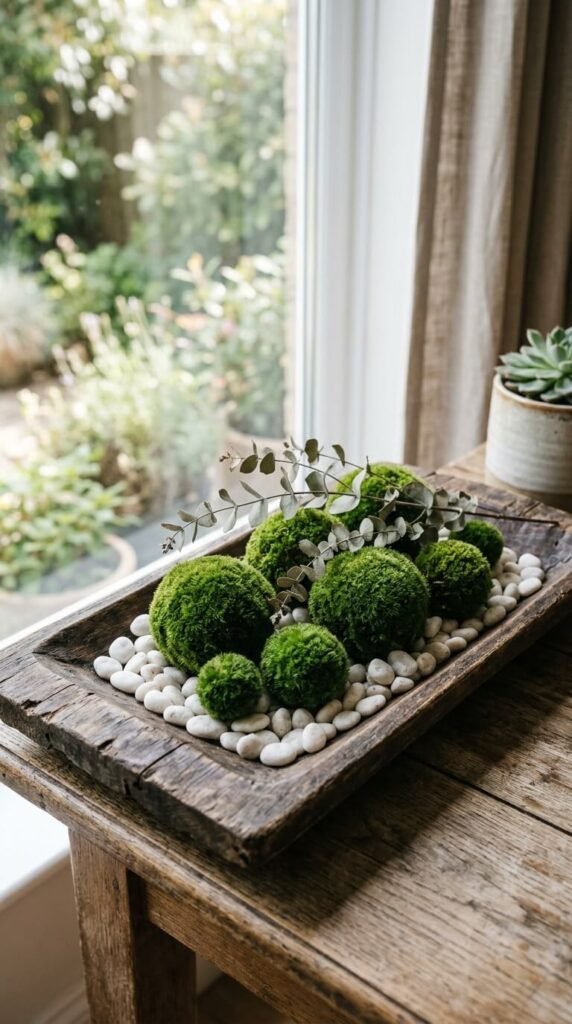
- Cluster three sizes together on a wooden or marble tray for a tiered, organic look
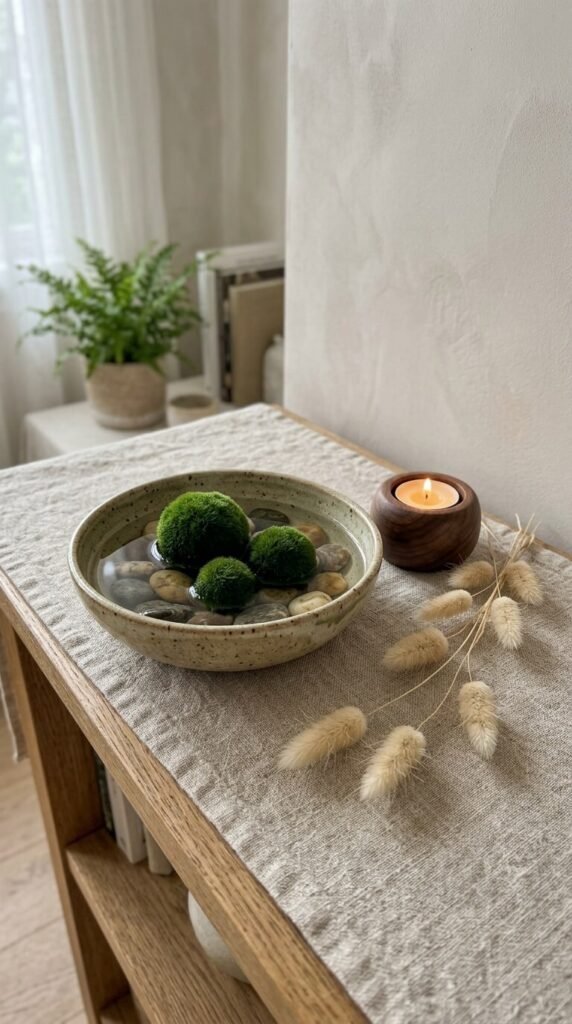
- Nestle them in a bowl of river rocks for a zen-inspired vignette
- Add height by placing one on a small ceramic pedestal or candle holder
- Mix with dried florals like bunny tail grass, white cotton stems, or baby’s breath
- Hang them in a window using clear fishing line at varying lengths for a floating garden effect
They also make beautiful table centerpieces for spring brunches, Easter gatherings, or just a quiet Sunday reset of your living room shelves.
Care Tips to Keep Them Looking Great
- Preserved moss needs no maintenance — just keep it out of direct harsh sunlight to prevent fading
- Live moss balls appreciate a light mist every few days and indirect light
- Dust them gently with a soft brush or a quick burst of compressed air every few weeks
Moss ball decor is one of those simple, satisfying projects that delivers maximum visual payoff for minimal effort. Whether you line a mantel, style a coffee table, or gift a set to a friend, these little green spheres bring a grounded, natural energy that just feels like spring.