Old rain boots don’t have to end up in a landfill — they can become the most charming conversation starters in your garden. Whether you’ve got a pair of kid-sized wellies that no longer fit or a grown-up set that’s seen better days, turning them into planters is one of those ideas that’s equal parts smart, sustainable, and seriously cute. The best part? You need almost no supplies and zero gardening experience to pull it off.
What You’ll Need Before You Start
You don’t need much to make this project happen. Gather these basics and you’re ready to go:
- Old rain boots (any size, any color — the quirkier the better)
- A drill or sharp nail for drainage holes
- Potting mix suited for the plants you’re using
- Small rocks or gravel for drainage
- Your chosen plants or seeds
- Optional: outdoor spray paint or waterproof sealant for decorating
That’s genuinely it. No trips to a specialty store required.
Step 1: Prep Your Boots for Planting
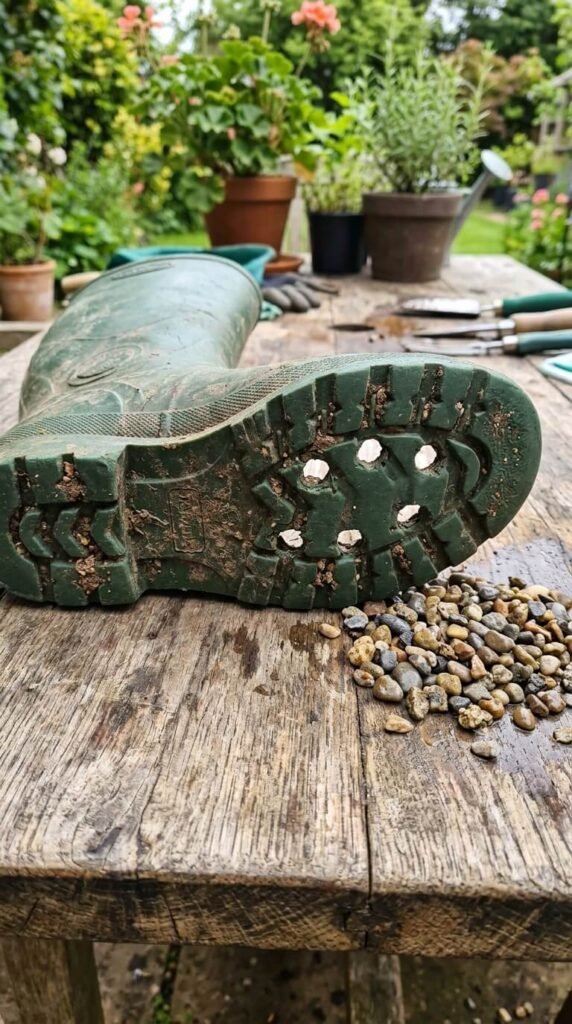
Before you add a single scoop of soil, you need to sort out drainage. Plants sitting in waterlogged boots will rot fast, so this step matters.
Flip each boot upside down and use a drill (or hammer a nail) to punch 4–6 holes in the sole. Space them out evenly so water can escape from multiple points. If the boot material is thick rubber, a power drill makes this much easier.
Once you’ve got your holes, drop a small layer of gravel or broken pottery pieces at the bottom of the boot. About an inch or two is plenty. This keeps the drainage holes from getting clogged with soil over time.
Step 2: Choose the Right Plants
This is where the fun really starts. Rain boots are compact containers, so you want plants that don’t need a huge root run. Think small and impactful.
Great options include:
- Trailing plants like sweet potato vine, bacopa, or ivy — these spill beautifully over the sides
- Compact flowers like pansies, petunias, marigolds, or impatiens
- Succulents for a low-maintenance, drought-tolerant look
- Herbs like thyme, chives, or mint if you want something practical
- Ferns or moss for a shady corner with a woodland vibe
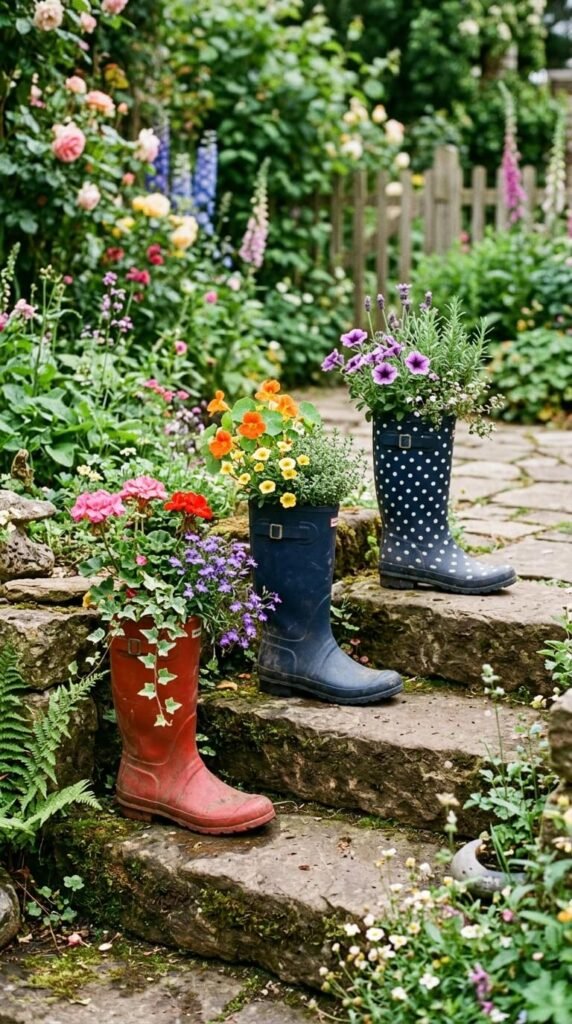
If you’re planting several boots together as a display, mix textures and heights to create visual interest. A tall plant at the back, a bushy one in the middle, and a trailing one spilling over the front looks especially polished.
Step 3: Fill and Plant
Add potting mix to your prepped boot, filling it about two-thirds full. Then nestle your plants in, gently loosening their roots if they’re root-bound from the nursery pot. Fill in around them with more soil, pressing lightly to eliminate air pockets.
Leave about an inch of space at the top — this makes watering easier and stops soil from spilling out every time you water.
Give everything a good drink right after planting. You’ll likely see water draining through the holes at the bottom, which is exactly what you want to see.
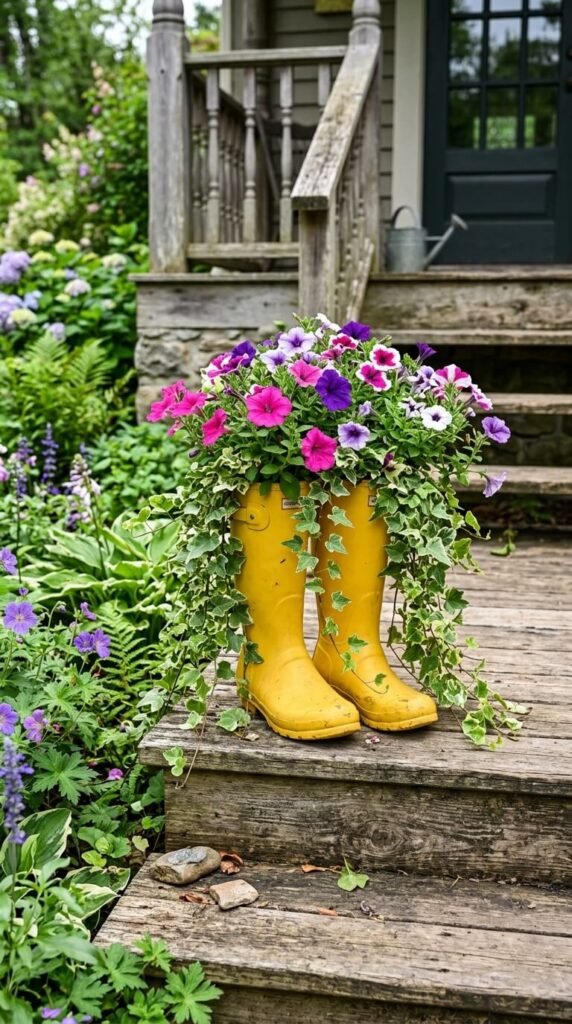
Step 4: Style and Display Your Boot Planters
Here’s where your personality gets to shine. A single boot planter is sweet, but a curated collection is a showstopper.
Some display ideas that work really well:
- Line a garden path with a mix of boot sizes for a whimsical walkway effect
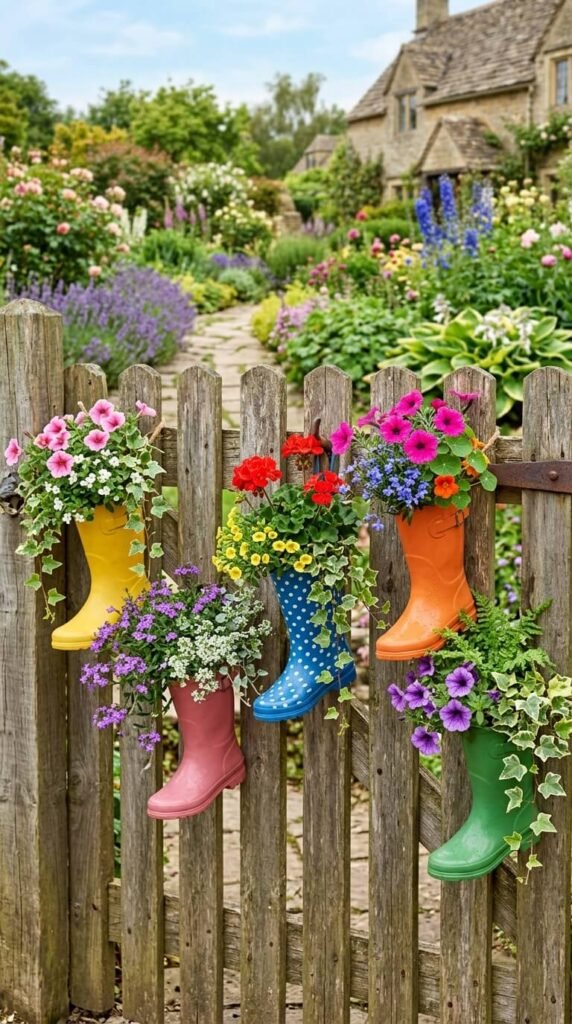
- Mount them on a fence using sturdy hooks for a vertical garden moment
- Group them on a front porch at different heights using crates or steps
- Pair kids’ boots with adult boots in a matching color family for a family-friendly garden vibe
If you want to take it up a notch, spray-paint plain boots with outdoor paint before planting. Stripes, polka dots, or even hand-painted patterns turn basic rubber boots into genuine garden art.
Caring for Your Boot Planters
Boot planters dry out a bit faster than regular pots because of their shape, so check the soil every day or two during hot weather. Stick your finger an inch into the soil — if it feels dry, it’s time to water.
Feed your plants with a balanced liquid fertilizer every two to three weeks during the growing season to keep blooms going strong.
At the end of the season, remove the plants and store boots indoors to extend their lifespan. Most rubber boots can go several seasons if they’re not left outside through harsh winters.
Save This Idea for Your Next Garden Project!
Rain boot planters are proof that the most charming garden ideas don’t require a big budget or a green thumb — just a little creativity and a pair of boots you’d otherwise toss out. Whether you go wild with color or keep it simple and elegant, they bring a guaranteed smile to everyone who sees them.
Pin this article so you can come back to it when those old boots need a second life. And if you try this project, you’ll want to make more than one — trust us on that.