You don’t need a weekend, a craft store haul, or a Pinterest-level skill set to bring spring into your home. All you need is a mason jar, a few supplies you probably already own, and 15 minutes. That’s it. These little jars pack a huge decorating punch — on a windowsill, a dining table, or a shelf — and they’re so easy to switch up with the seasons.
Let’s get into it.
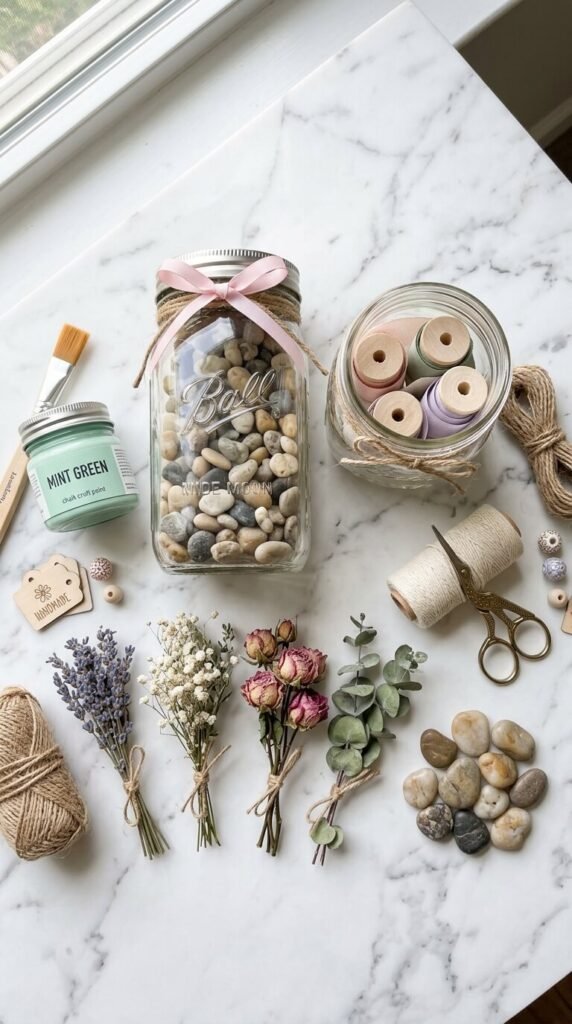
What You’ll Need
Keep this simple. The beauty of mason jar decor is that it doesn’t ask much of you. Before you start, gather:
- Mason jars — any size works; wide-mouth pint jars are the most versatile
- Twine or ribbon — burlap twine for a farmhouse look, pastel ribbon for something sweeter
- Floral stems — fresh, dried, or faux; wildflowers, eucalyptus, tulips, or daisies all work beautifully
- Moss, pebbles, or marbles — for the base layer inside the jar
- Optional extras — chalk paint, a paintbrush, lace trim, or decorative washi tape
That’s your whole supply list. If you have even half of these on hand, you’re already ready to go.
Step 1: Prep Your Jar (2 Minutes)
Start with a clean, dry jar. If you want a painted look — like a soft sage green or a chalky white — give the outside one quick coat of chalk paint and let it dry for a few minutes. You don’t need full coverage; a slightly brushed, imperfect finish actually looks more charming.
Skip the paint entirely if you love the clear glass look. There’s something fresh and airy about a transparent jar that lets the stems and fillers do all the talking.
Step 2: Add Your Base Layer (3 Minutes)
Before adding flowers, drop a small handful of your filler into the jar. This does two things: it anchors your stems and adds a layer of visual texture.
Good base layer options:
- Pebbles or river rocks — clean and modern
- Sheet moss — soft, earthy, and very cottagecore
- Sand or soil — great if you’re planting something small like succulents
- Clear marbles — bright and playful for a kids’ room vibe
About an inch of filler is plenty. You just need enough to hold stems upright.
Step 3: Arrange Your Florals (5 Minutes)
This is the fun part. Trim your stems so they sit about 2–3 inches above the jar rim — not too tall, not too short. Start with your largest, fullest stem in the center, then layer in smaller or trailing pieces around it.
A few arrangement tips:
- Odd numbers (3 or 5 stems) always look more natural than even
- Mix textures — pair something fluffy like baby’s breath with something structured like a tulip
- Let one or two stems lean slightly to one side for an effortless, just-picked feel

Step 4: Wrap and Finish (5 Minutes)
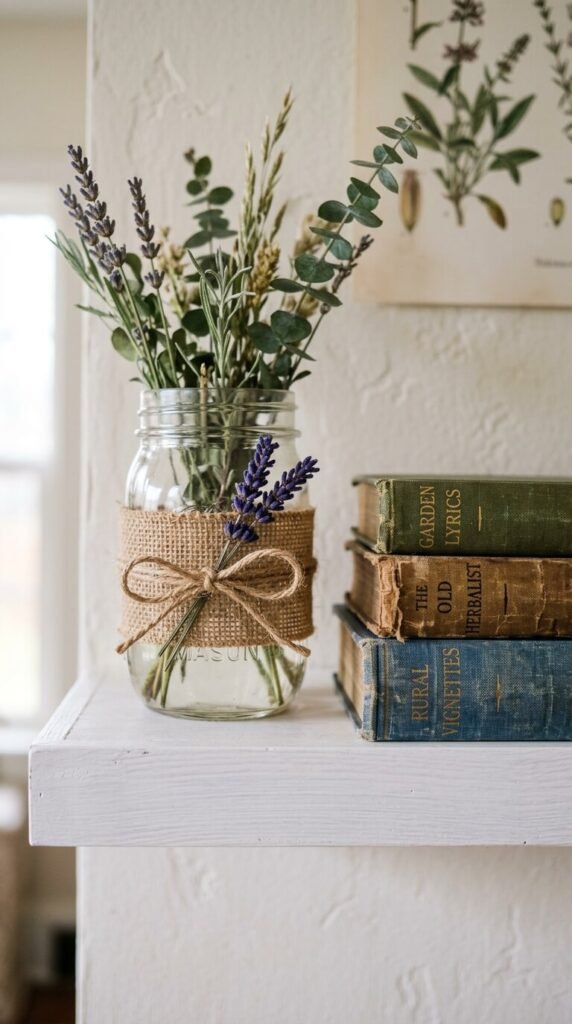
Now add the finishing touch that takes it from “jar with flowers” to actual decor. Wrap a length of twine or ribbon around the neck of the jar and tie it in a simple bow or knot.
Other easy finishing ideas:
- Tie on a small sprig of lavender or eucalyptus with the twine
- Wrap a strip of lace and secure with a dot of hot glue
- Layer two different ribbons for a more festive look
- Add a small gift tag with a seasonal word like “Bloom” or “Hello, Spring”
Small details make a big difference when you’re working with something this compact.
Ways to Display Your Spring Jars
Once you’ve made one, you’ll want to make three. Here are some easy ways to use them around your home:
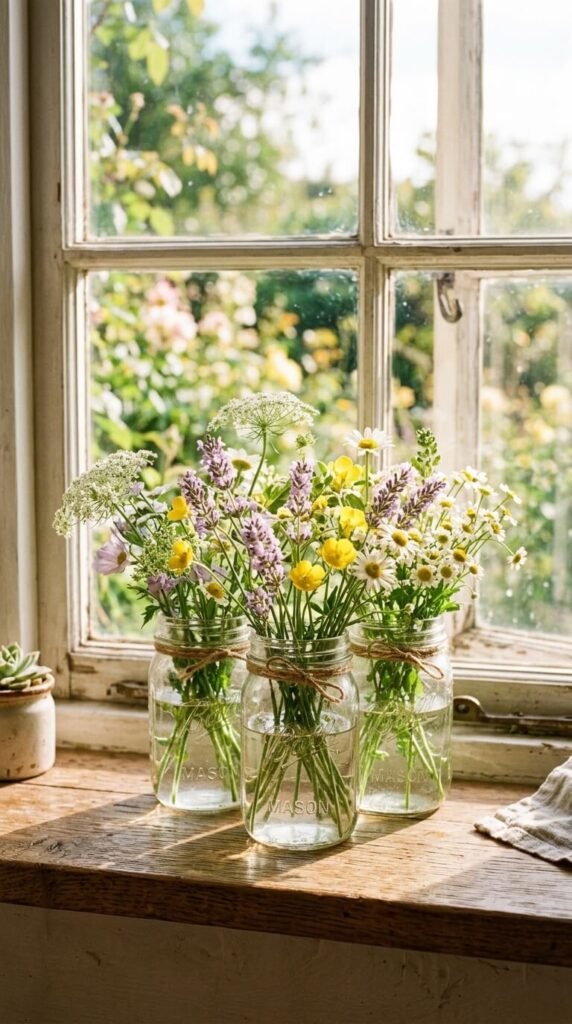
- Windowsill trio — line up three jars in graduating sizes with coordinating flowers
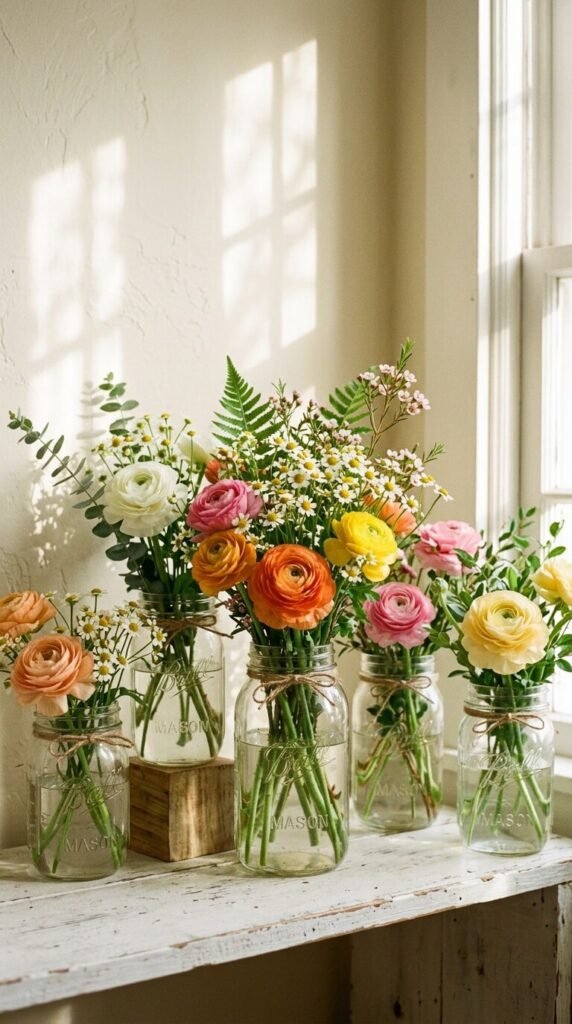
- Table centerpiece — cluster five jars at different heights down the center of a dining table
- Bathroom shelf — tuck one small jar with eucalyptus near your sink for a spa-like feel
- Outdoor entertaining — set jars along a porch railing or outdoor table as simple natural decor
- Gift idea — fill with a candle or bath salts and wrap with ribbon for an easy hostess gift
The 15-Minute Payoff
Spring mason jar decor is one of those rare craft projects where the effort is tiny and the result feels genuinely satisfying. There’s no drying time, no special tools, no mess that takes longer to clean up than the project itself.
Make a few this weekend, swap out the stems as the season changes, and refresh your whole home for practically nothing.
Save this for later and tag us when you make yours — we love seeing how these come together in real homes!