There’s something about a beautifully set table that makes even a simple meal feel like a special occasion. And if you want to add a little springtime charm without spending a lot, DIY napkin rings are the perfect place to start. They’re quick to make, inexpensive, and the kind of detail that guests actually notice.
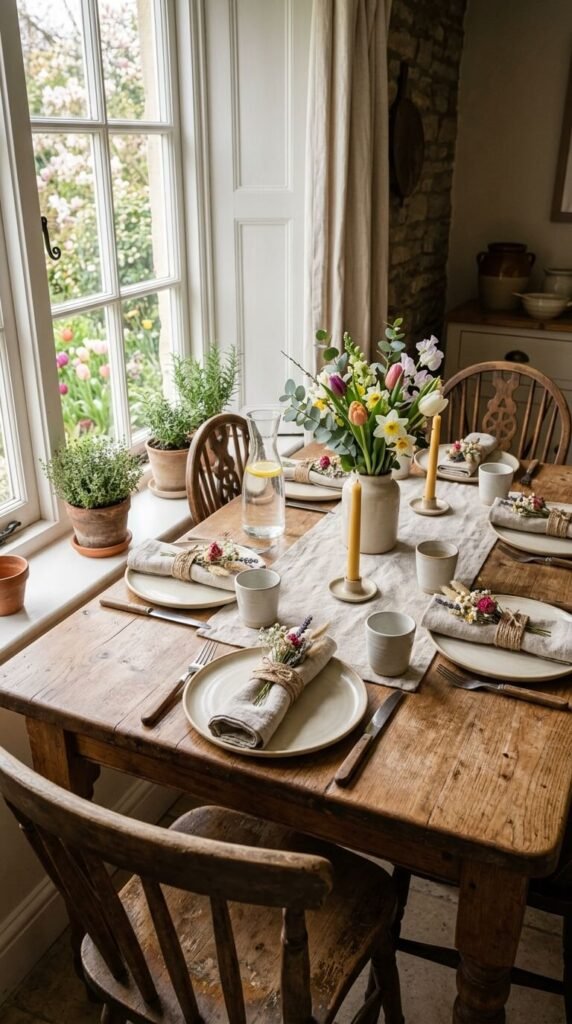
Whether you’re hosting an Easter brunch, a Mother’s Day lunch, or just want to freshen up your everyday table, these spring napkin rings are a fun and satisfying project — even for beginners.
What You’ll Need
The beauty of this project is that most of the supplies are either on hand already or easy to find at a craft store or dollar section. Here’s what to gather:
- Cardboard tubes (from paper towel or toilet paper rolls) — these form the base
- Twine or jute rope
- Hot glue gun and glue sticks
- Scissors
- Small faux or dried florals (think baby’s breath, lavender sprigs, or tiny daisies)
- Ribbon or lace trim (optional, for a more polished look)
- Paint or washi tape to customize the base if desired
You can also skip the cardboard tube base entirely and use metal ring clips, wooden bangles, or even thick wire shaped into a circle — all work beautifully.
Step 1 — Build Your Base
If you’re using cardboard tubes, cut them into 1.5 to 2-inch sections. These become the skeleton of each napkin ring. Sand any rough edges lightly with fine sandpaper if needed.

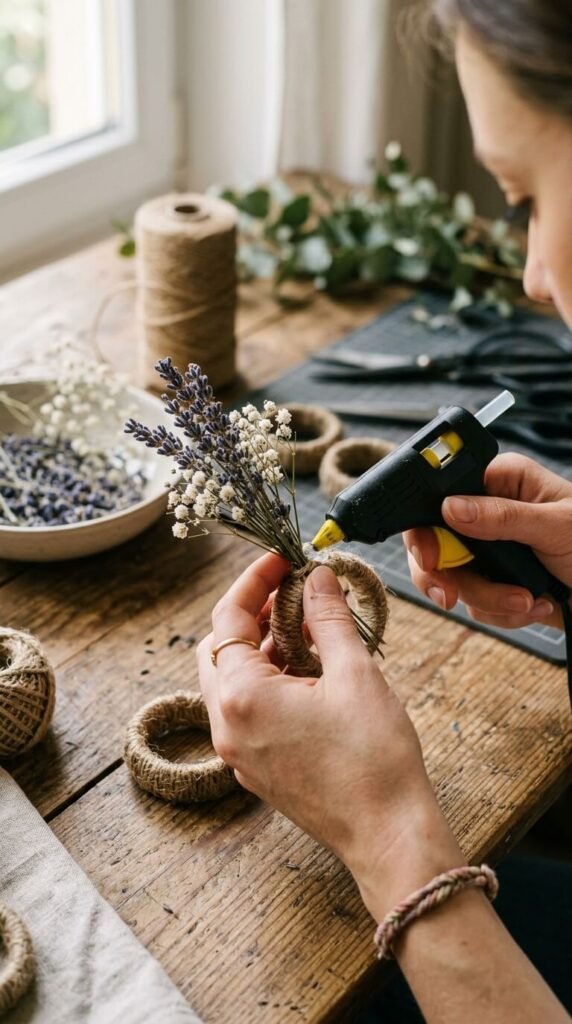
Wrap each ring tightly with twine or jute, securing the starting end with a dab of hot glue. Wind it around evenly, keeping the layers snug and flat. Glue down the finishing end once the ring is fully covered. This alone gives you a lovely rustic base that already looks intentional.
Step 2 — Add Your Spring Florals
This is where the magic happens. Cut your florals down to small clusters — you want them to sit close to the ring rather than sticking way out. Think delicate, not dramatic.
Use your hot glue gun to attach the florals to one side of the ring. A few ideas that work especially well for spring:
- Lavender sprigs for a soft purple pop
- Baby’s breath for a light, airy feel
- Mini eucalyptus for a fresh, green touch
- Tiny ribbon bows in pastel yellow or blush
- Small faux eggs or butterflies for an Easter-themed version
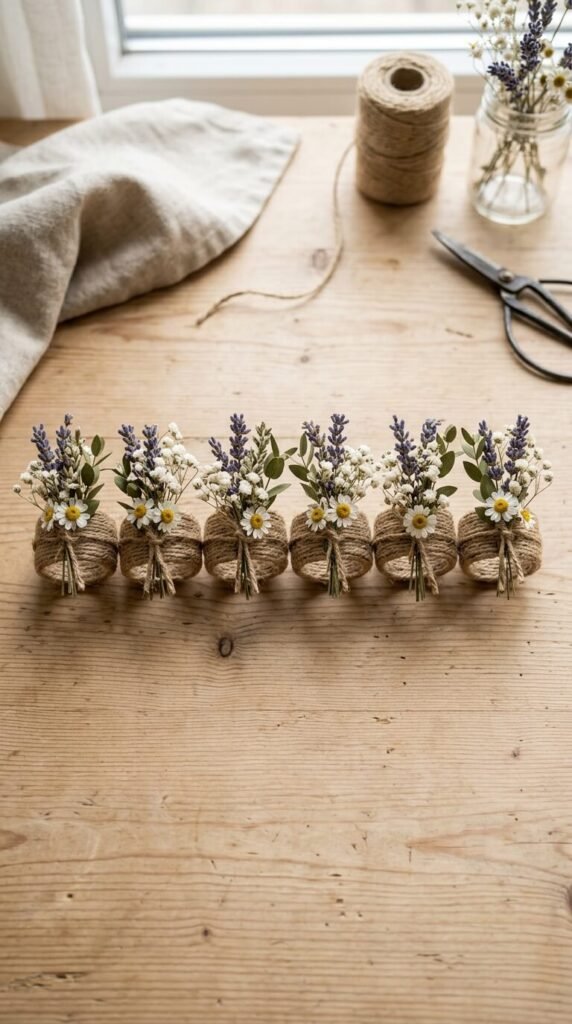
Layer two or three different elements together for a more styled, dimensional look. Don’t overthink it — asymmetry is actually your friend here.
Step 3 — Style and Finish
Once the glue is dry, give each ring a gentle press to make sure everything is secure. If you want a more polished finish, wrap a thin ribbon around the base of the florals to hide any glue edges — this small step makes a big difference.
For a cohesive table look, make all the rings match or do a mixed-and-matched set using the same color family. Soft greens, blush pinks, whites, and lavender all feel very spring-appropriate.
A Few Extra Tips
- Make extras — they also work beautifully as gift wrap embellishments or place card holders
- Store them flat in a shallow box to protect the florals between uses
- Swap the florals seasonally to use the same base year-round
- These make a thoughtful handmade gift tucked alongside a candle or kitchen towel
Set the Table You Love
Spring is really about slowing down and enjoying the little things — and a handmade napkin ring is exactly that kind of small, intentional detail. It takes less than 30 minutes to make a full set, and the result looks like something straight off a Pinterest board.
Save this idea for your next spring gathering, and don’t be surprised when someone asks where you bought them!